lightroom

INSTANT FILM FUJI 100 C LIGHTROOM PRESETS

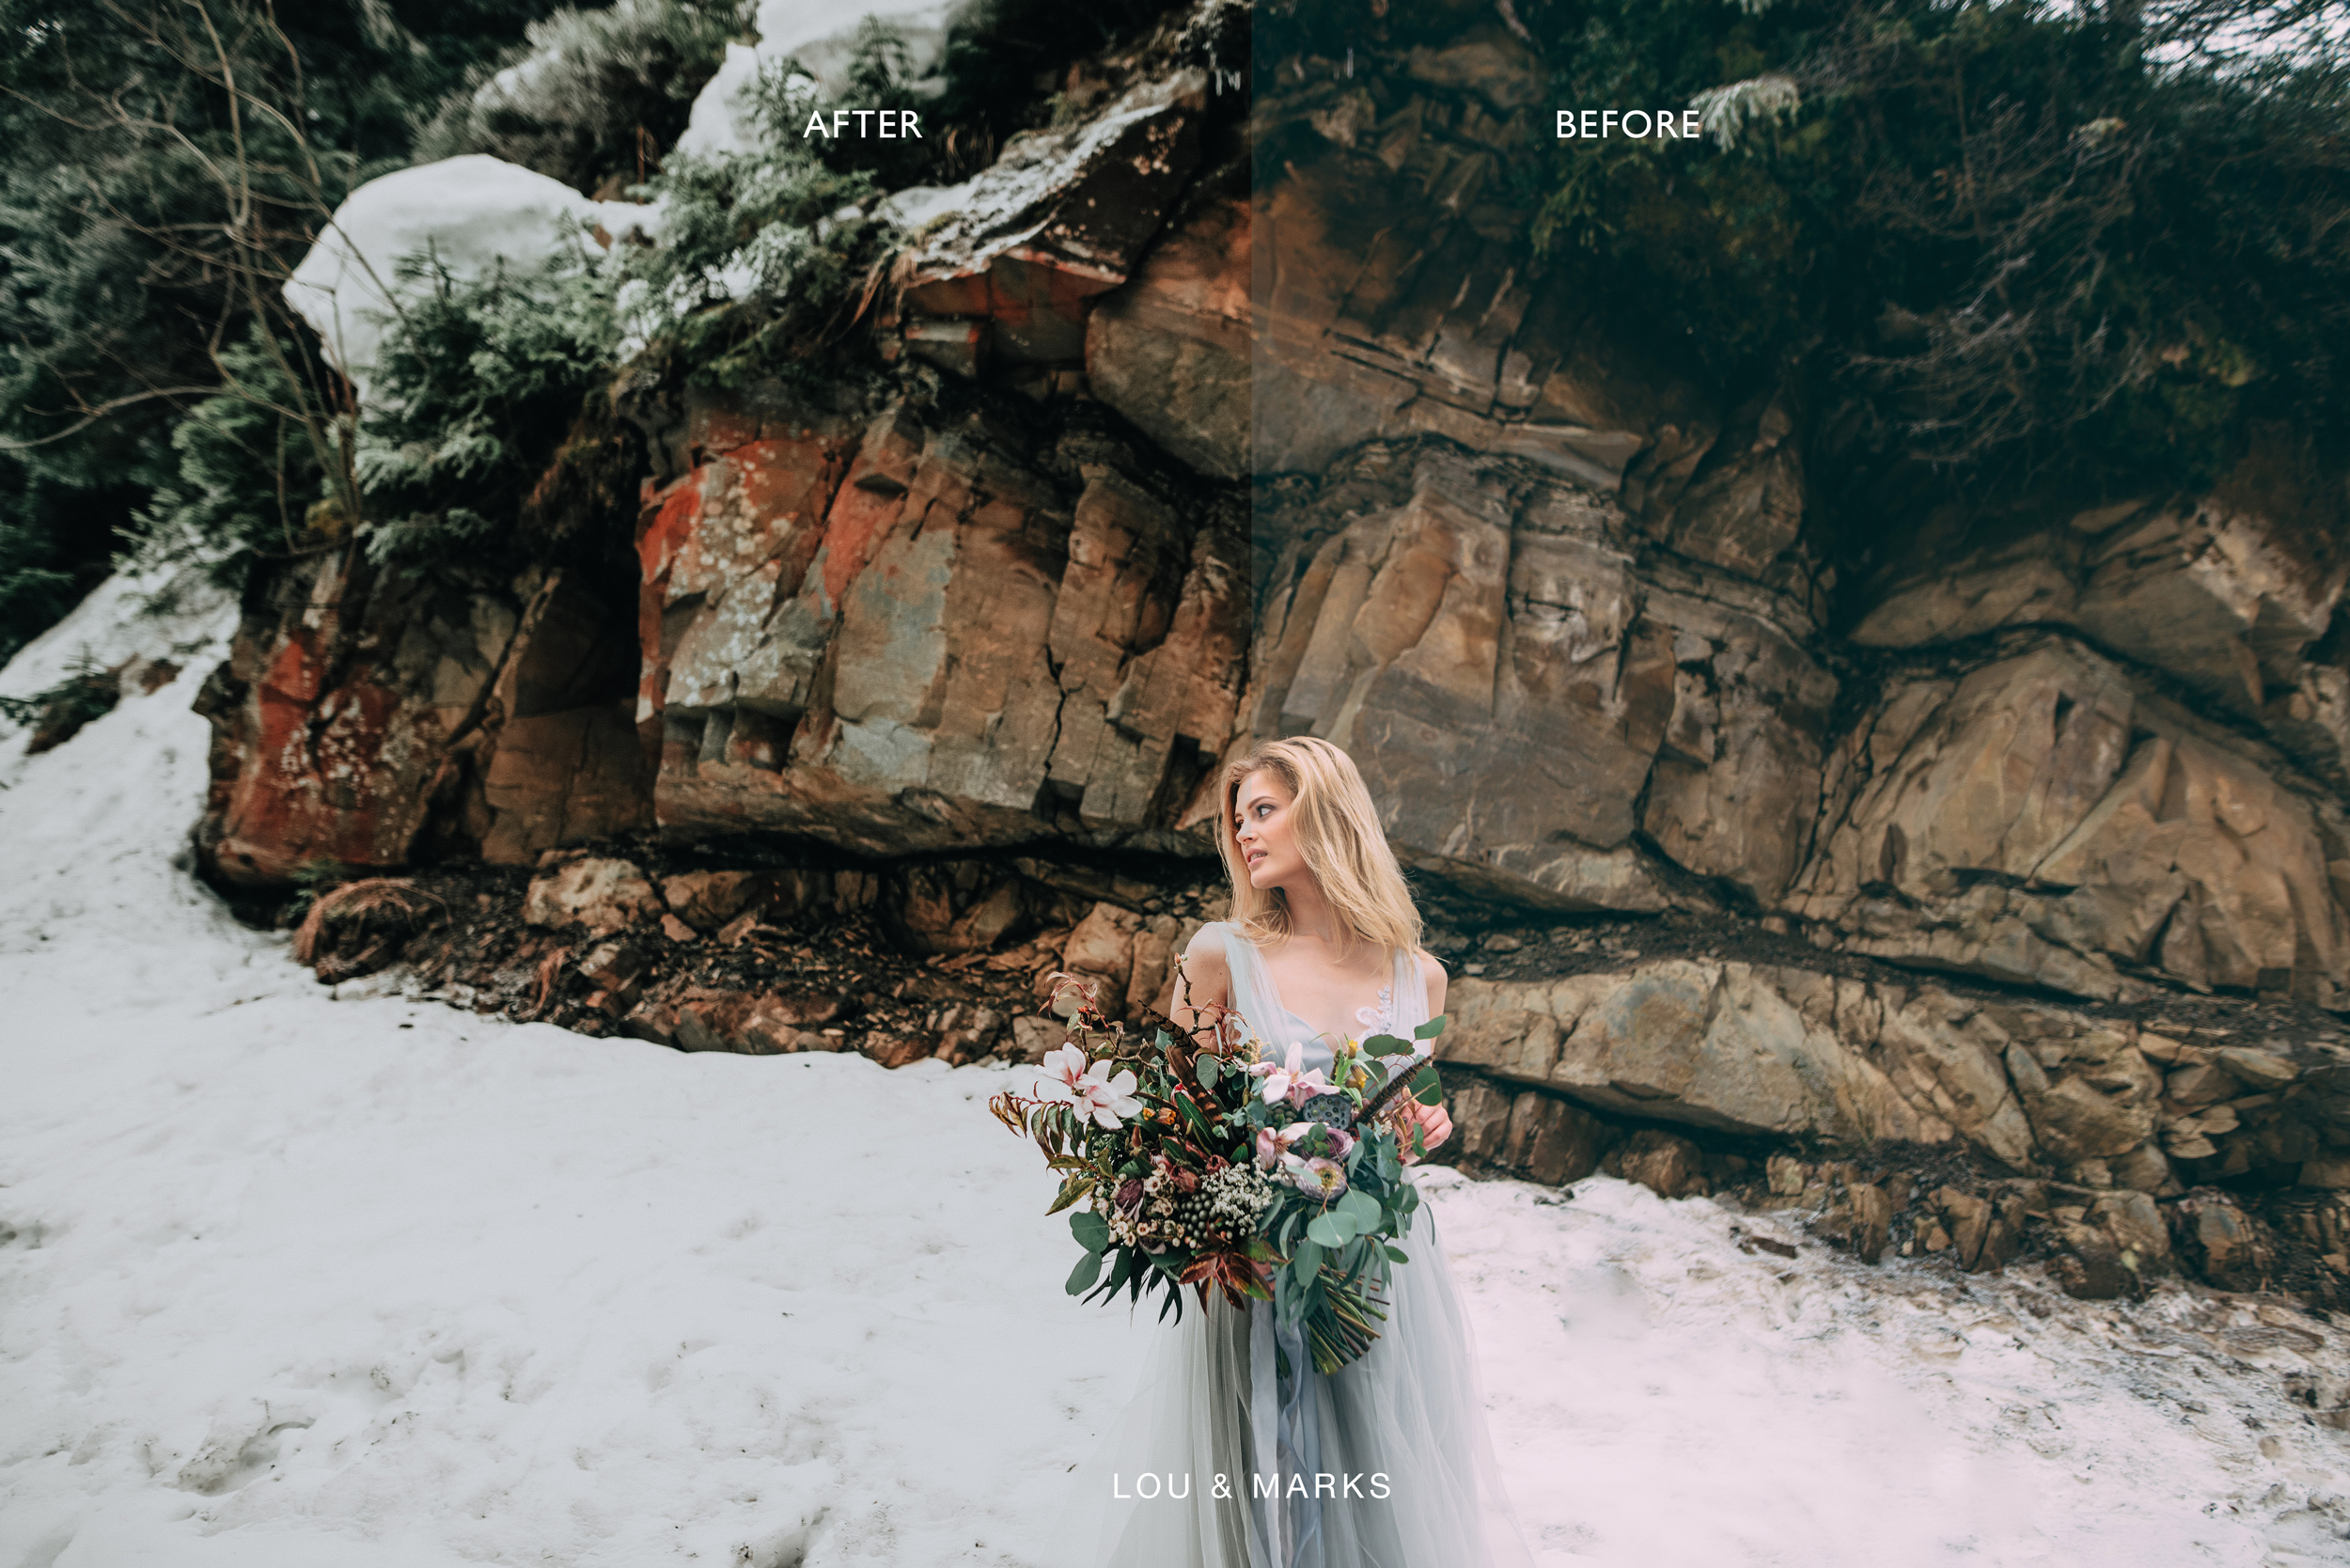
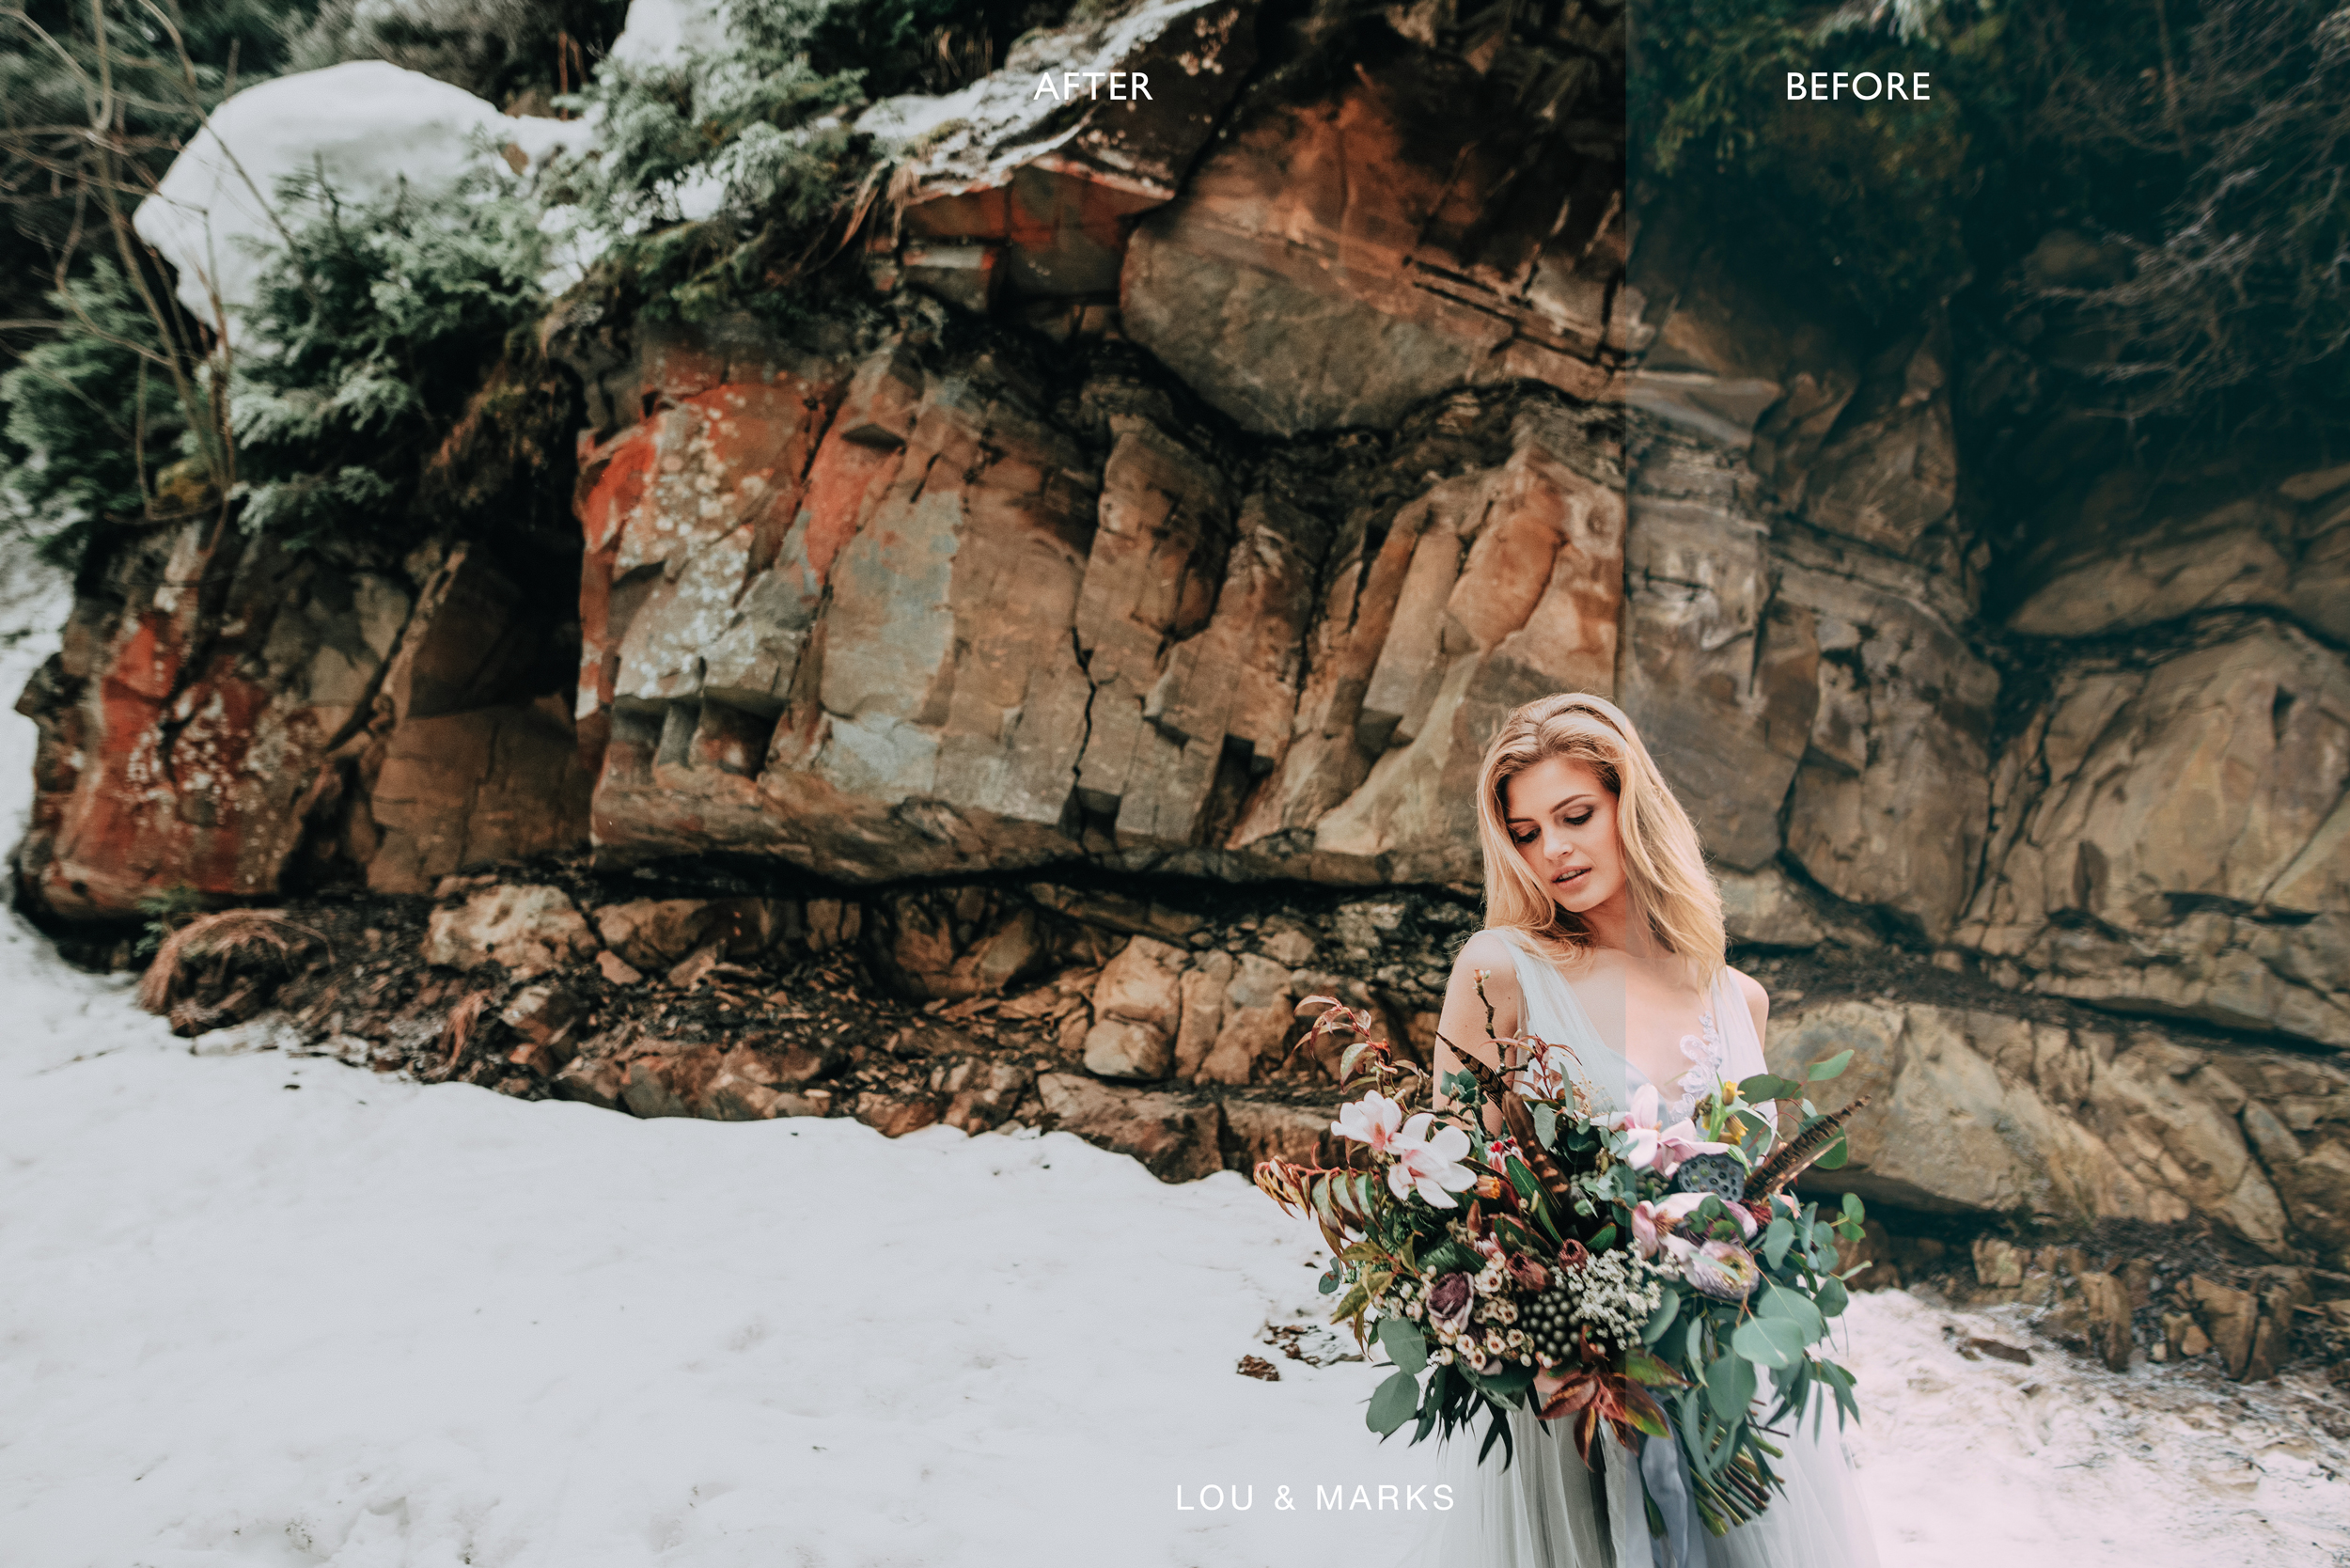
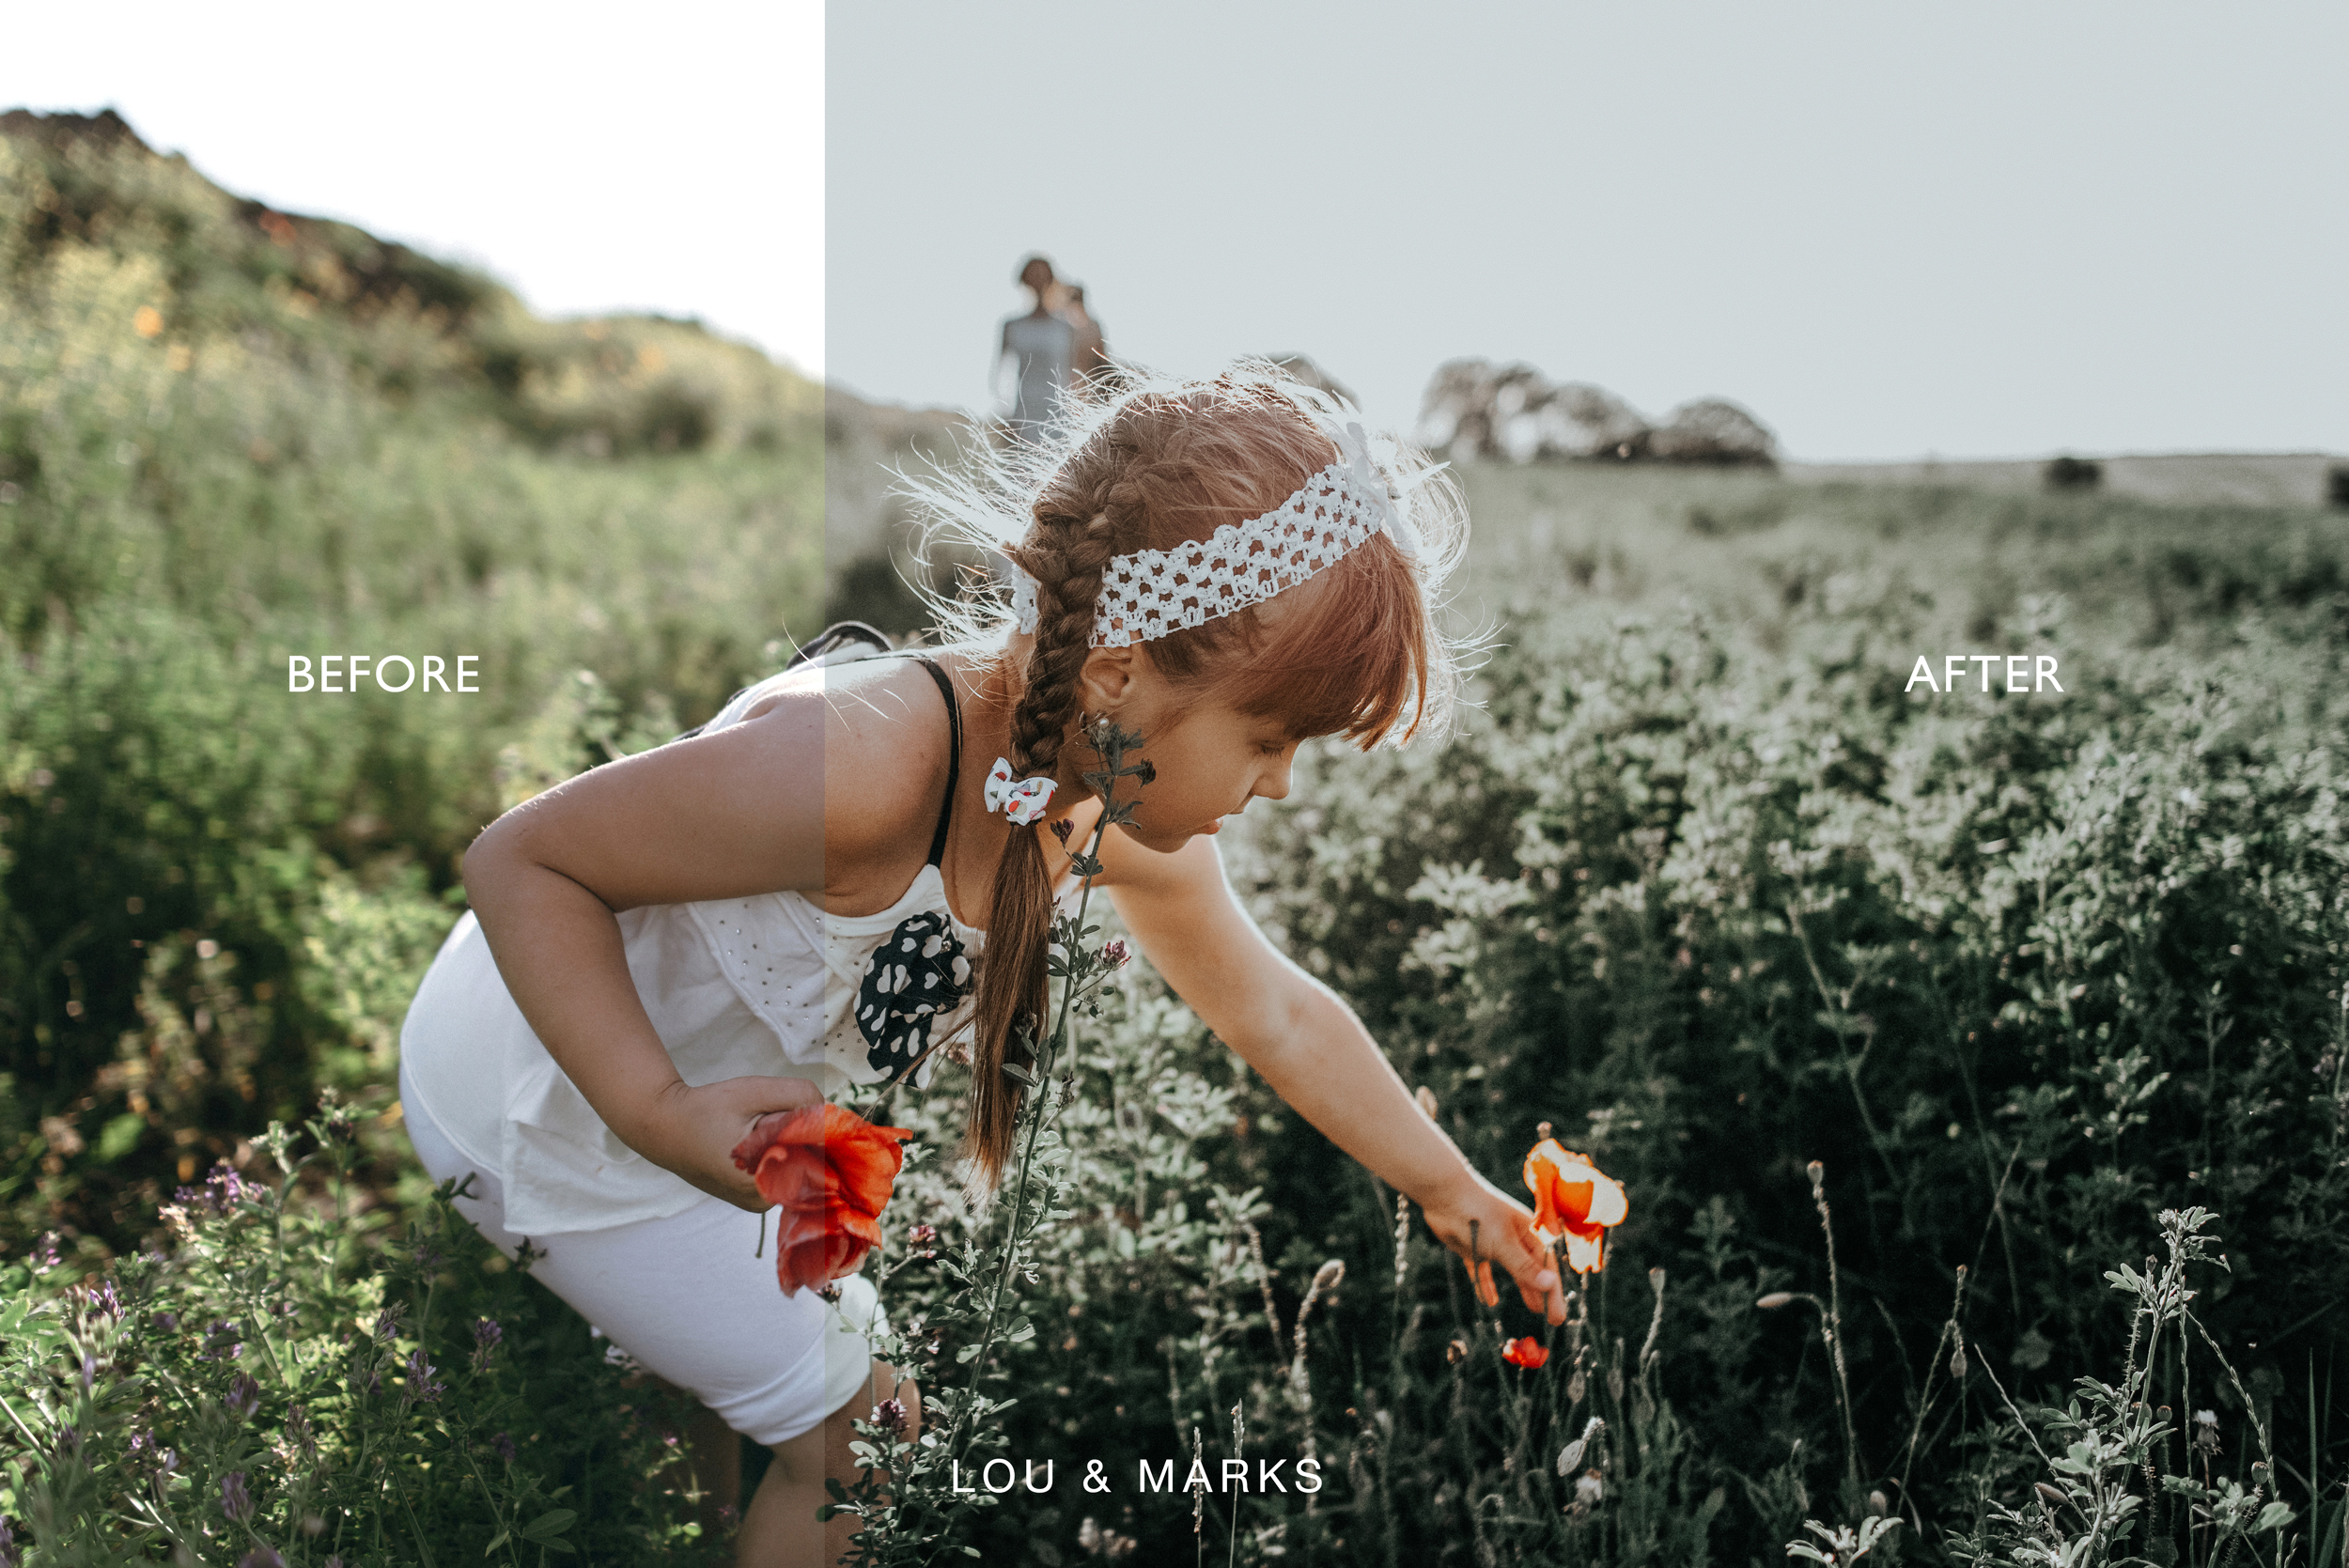
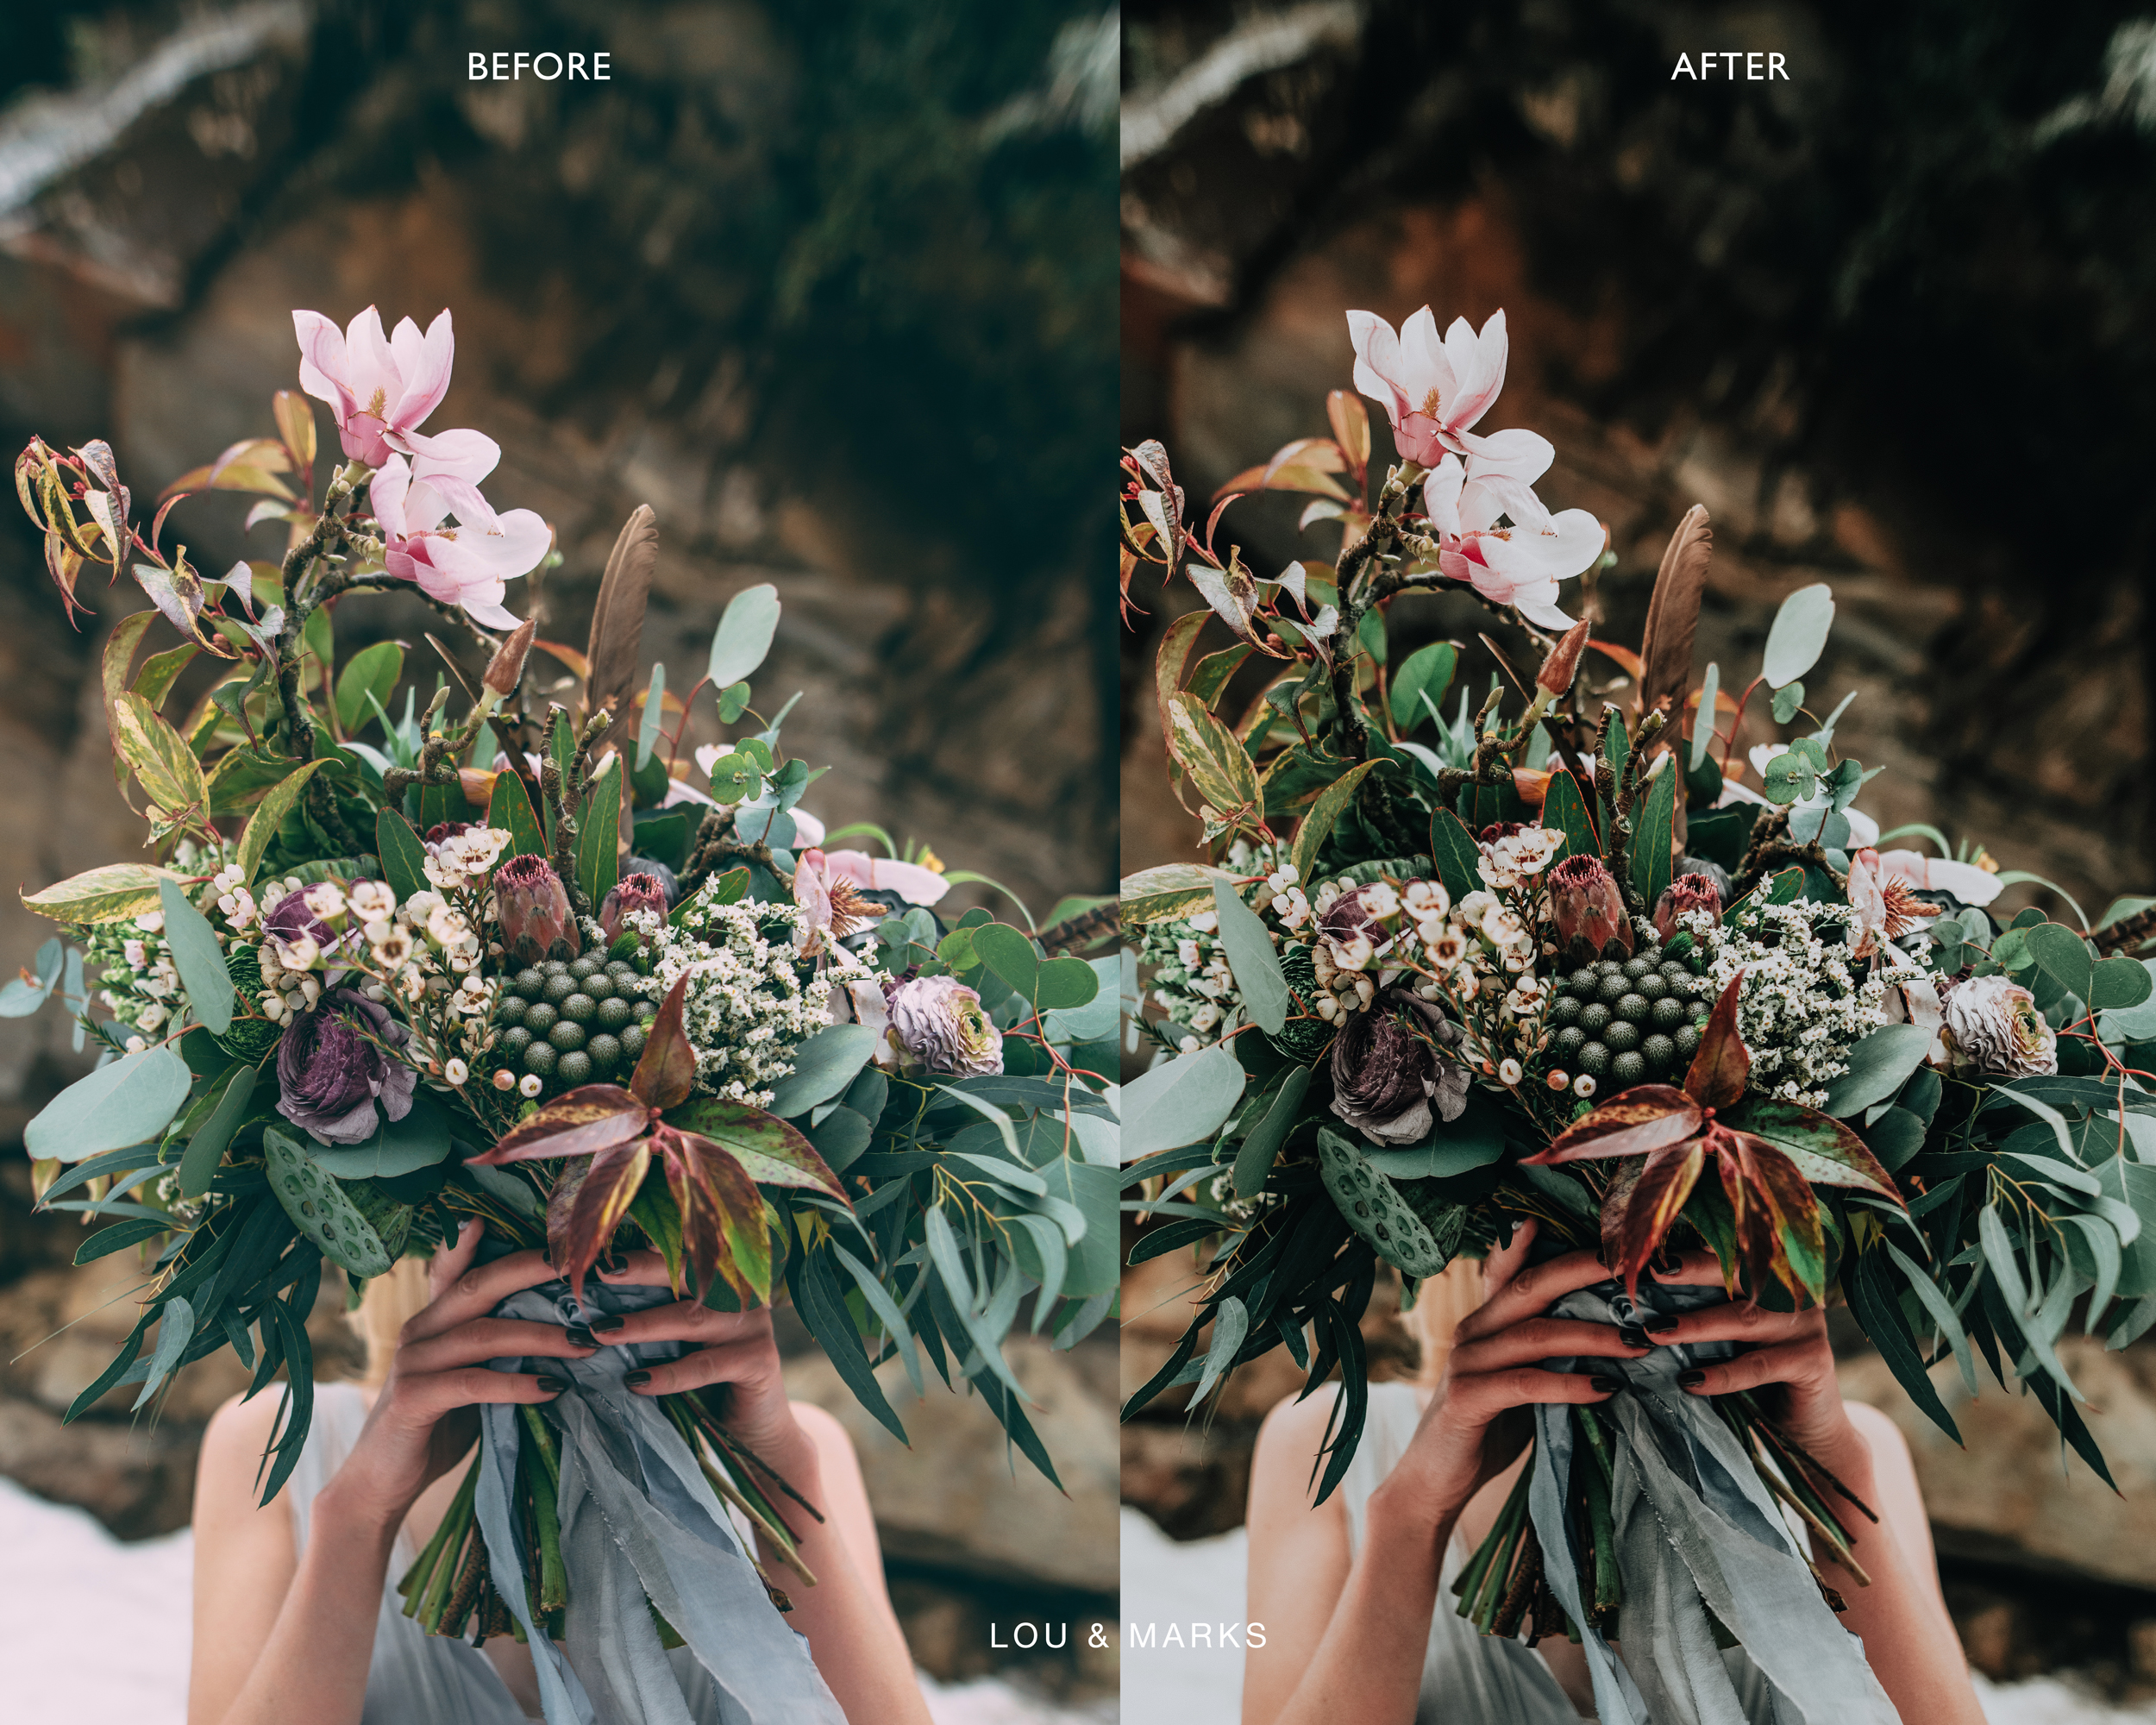
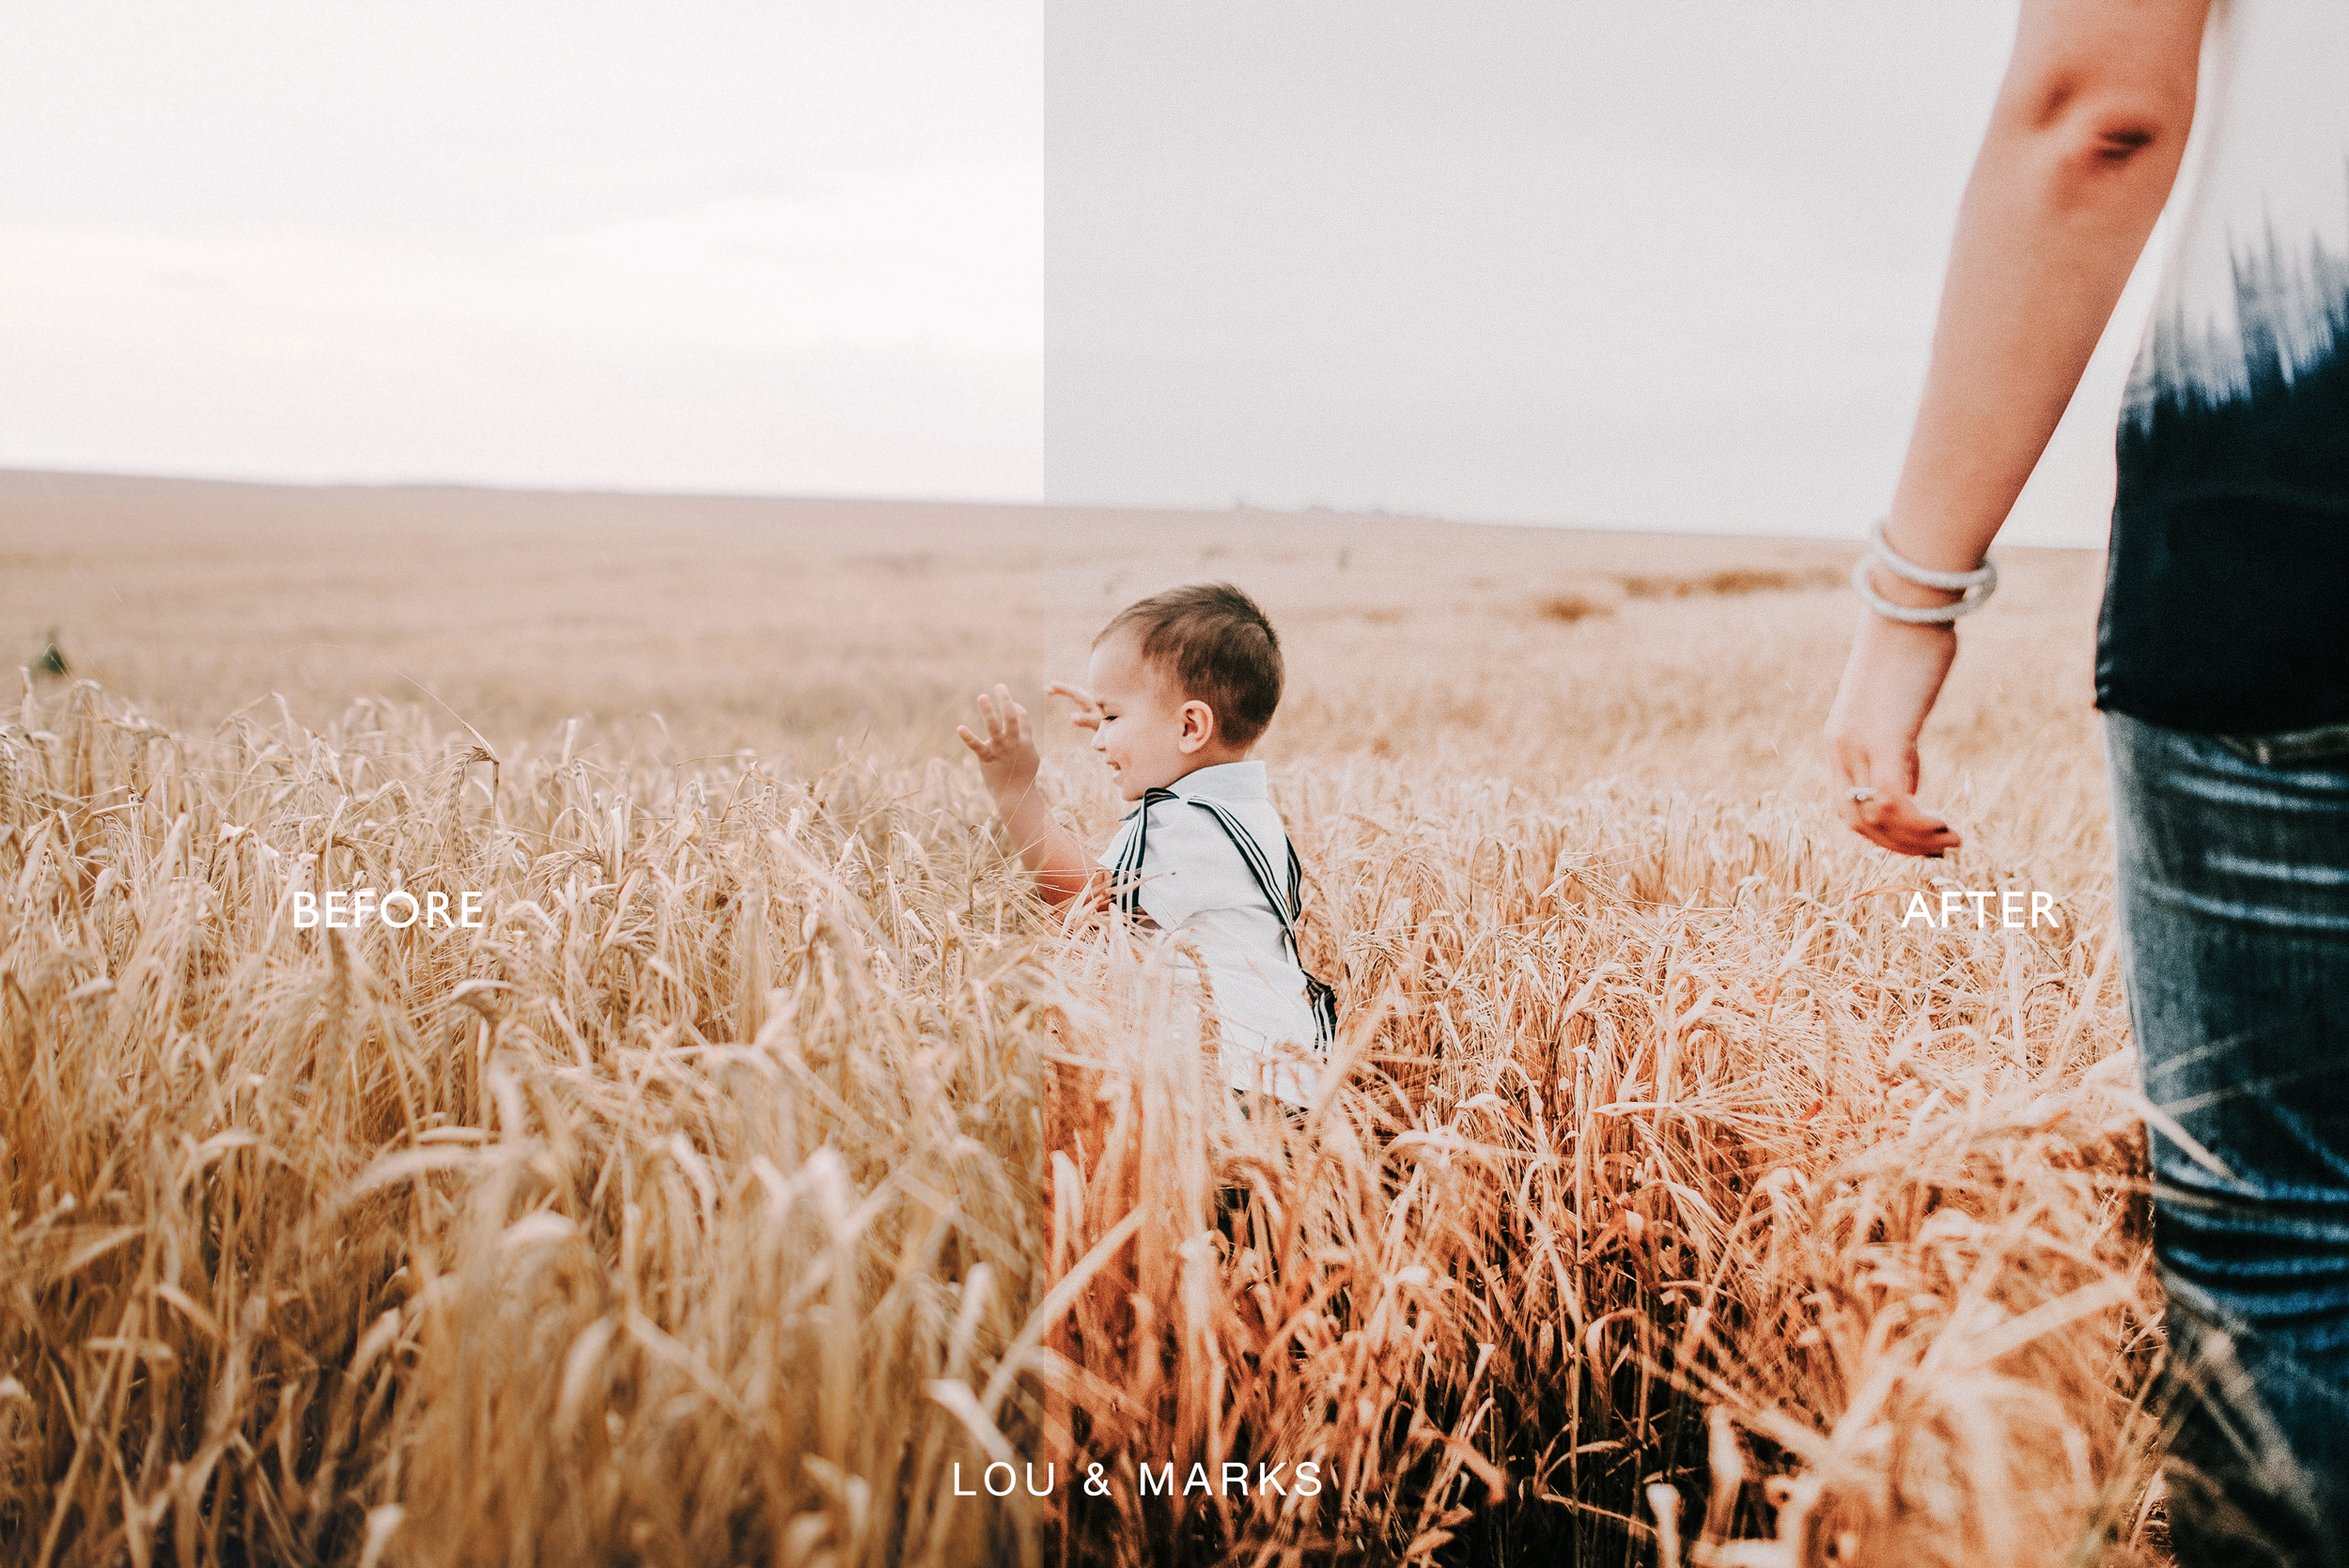
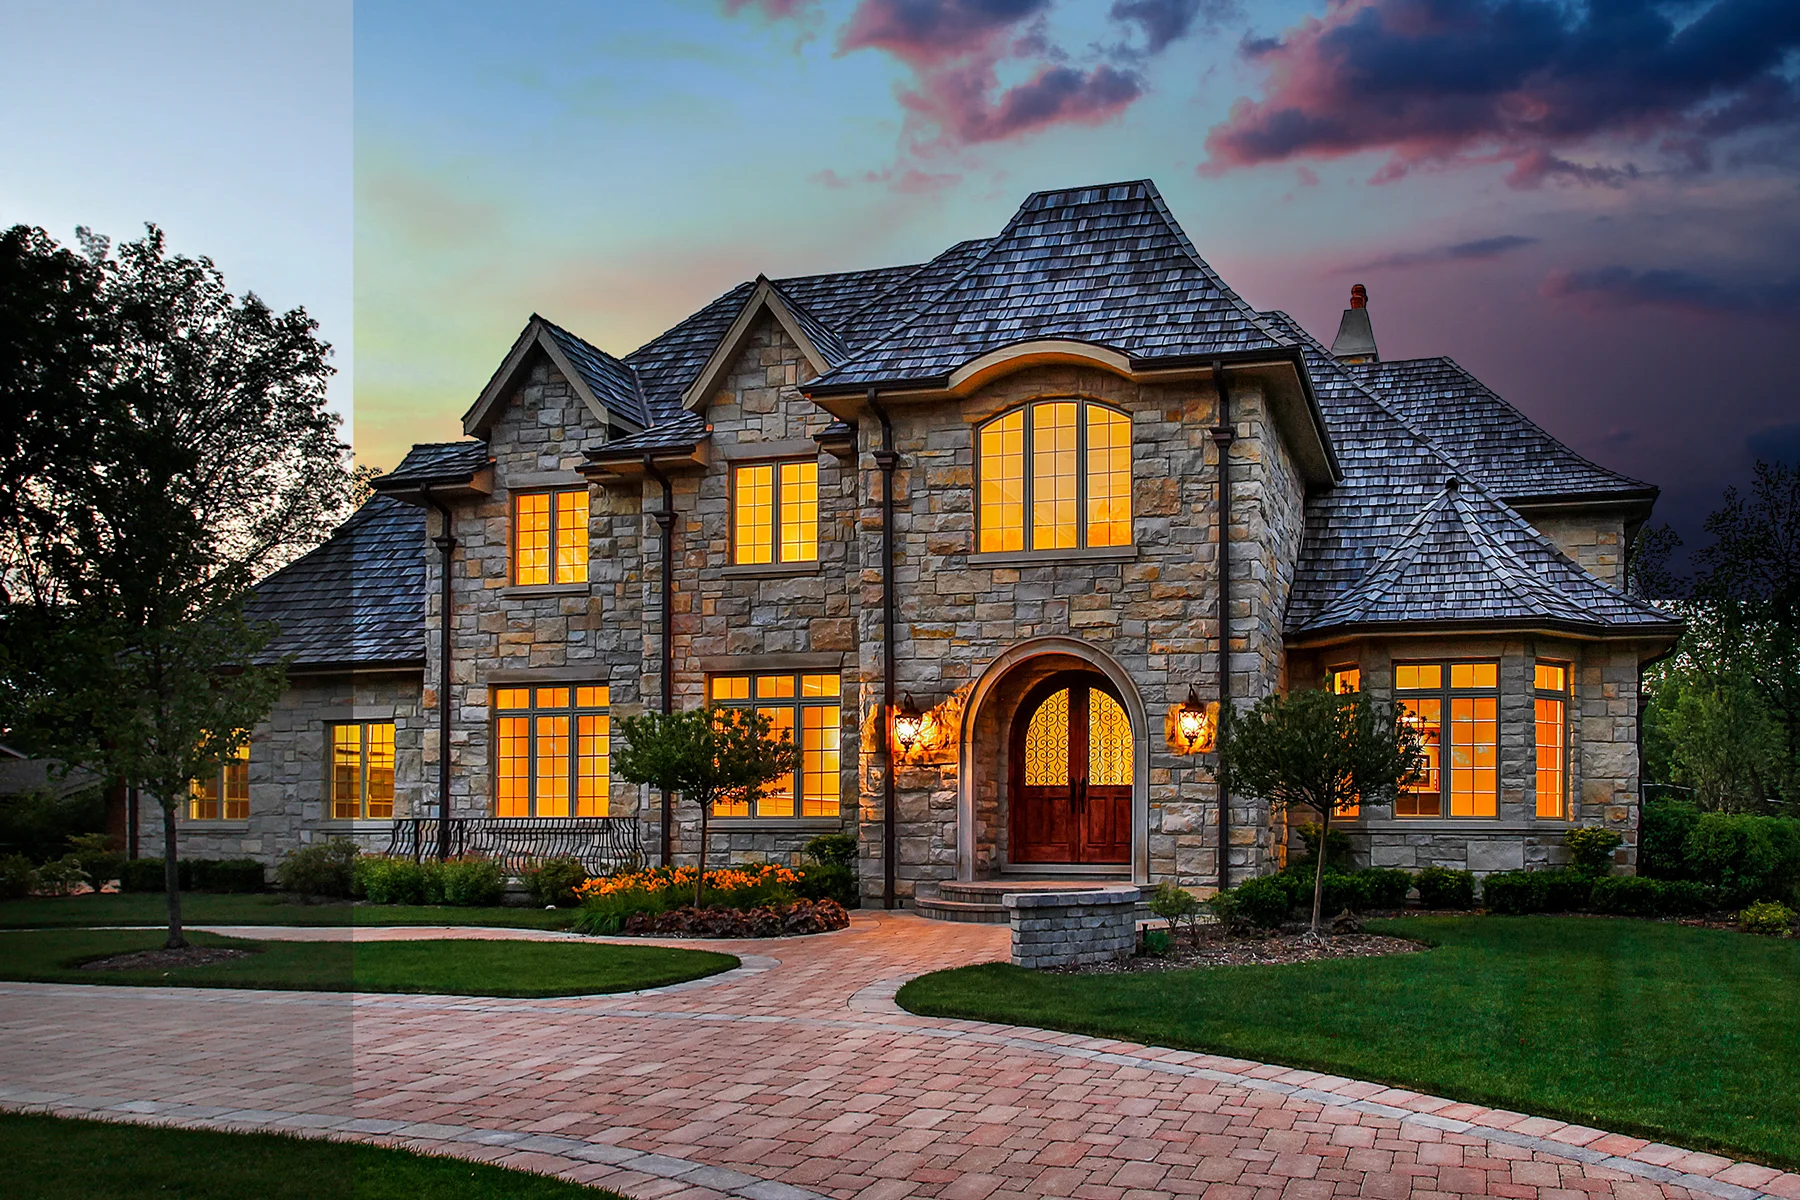
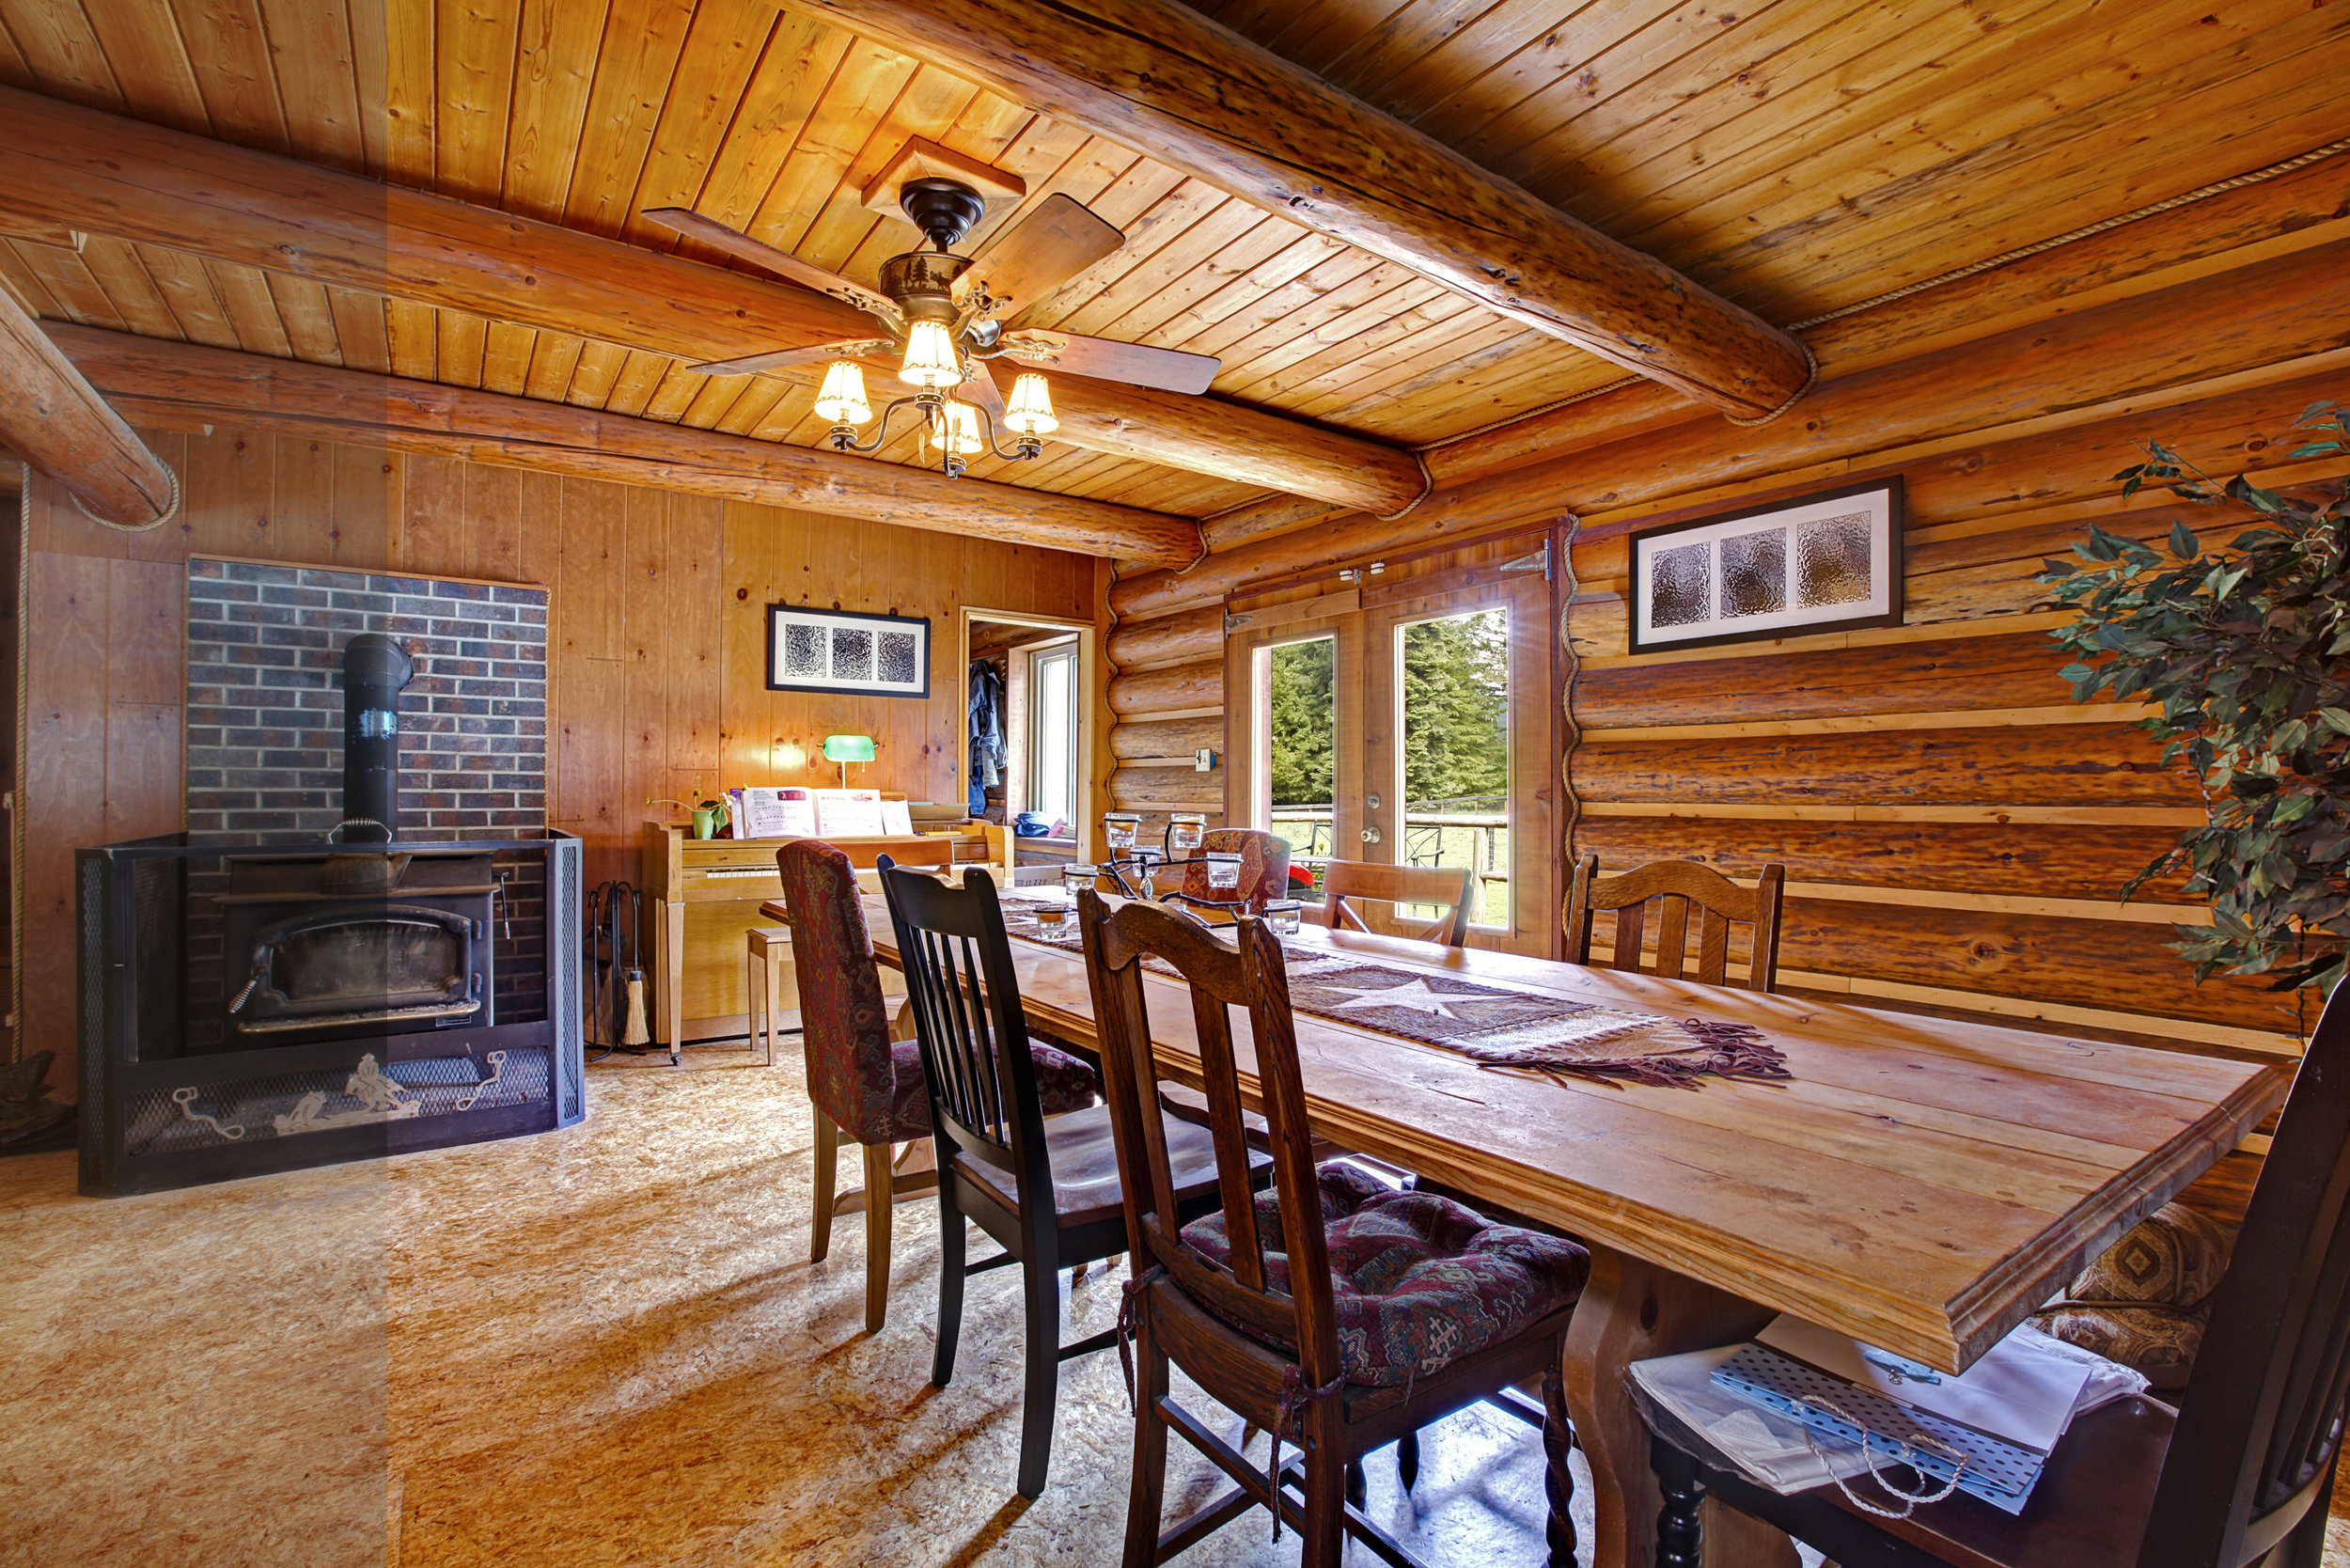
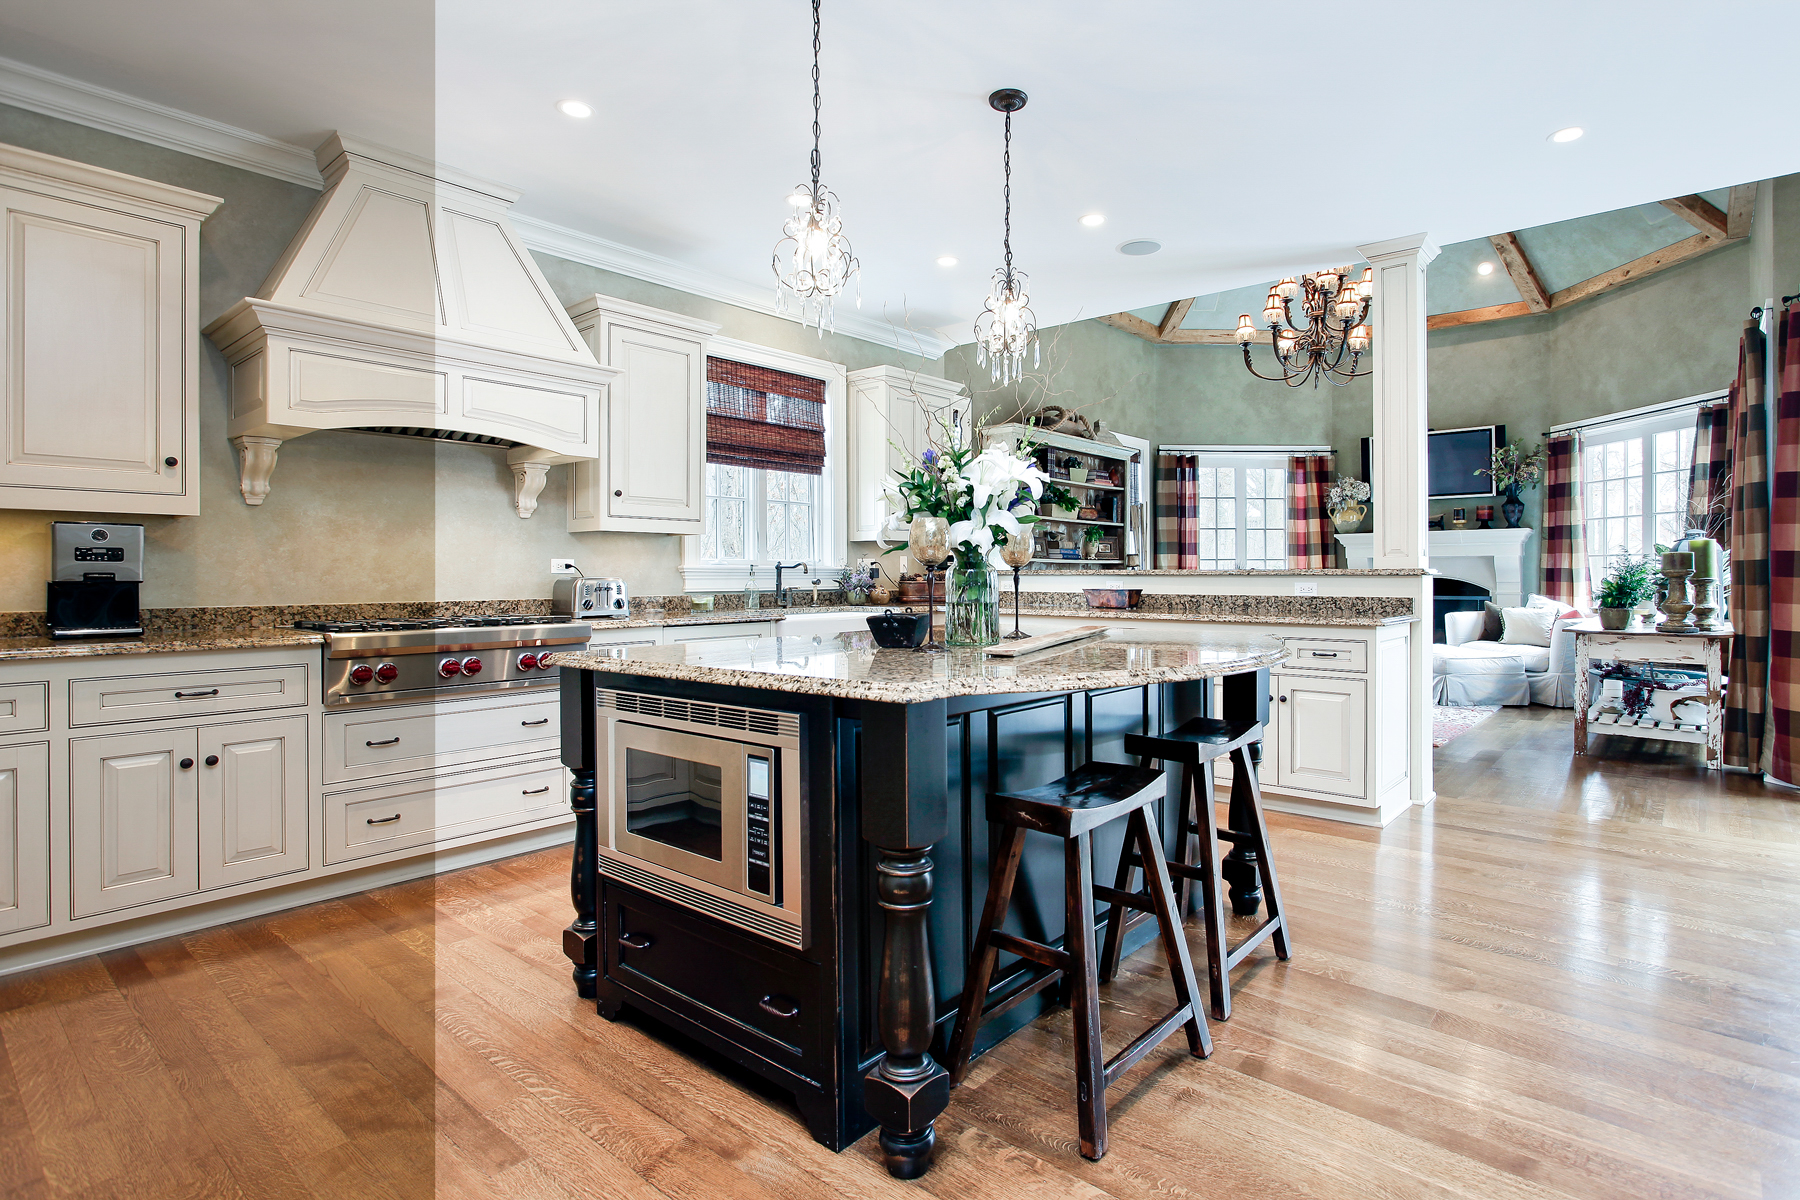
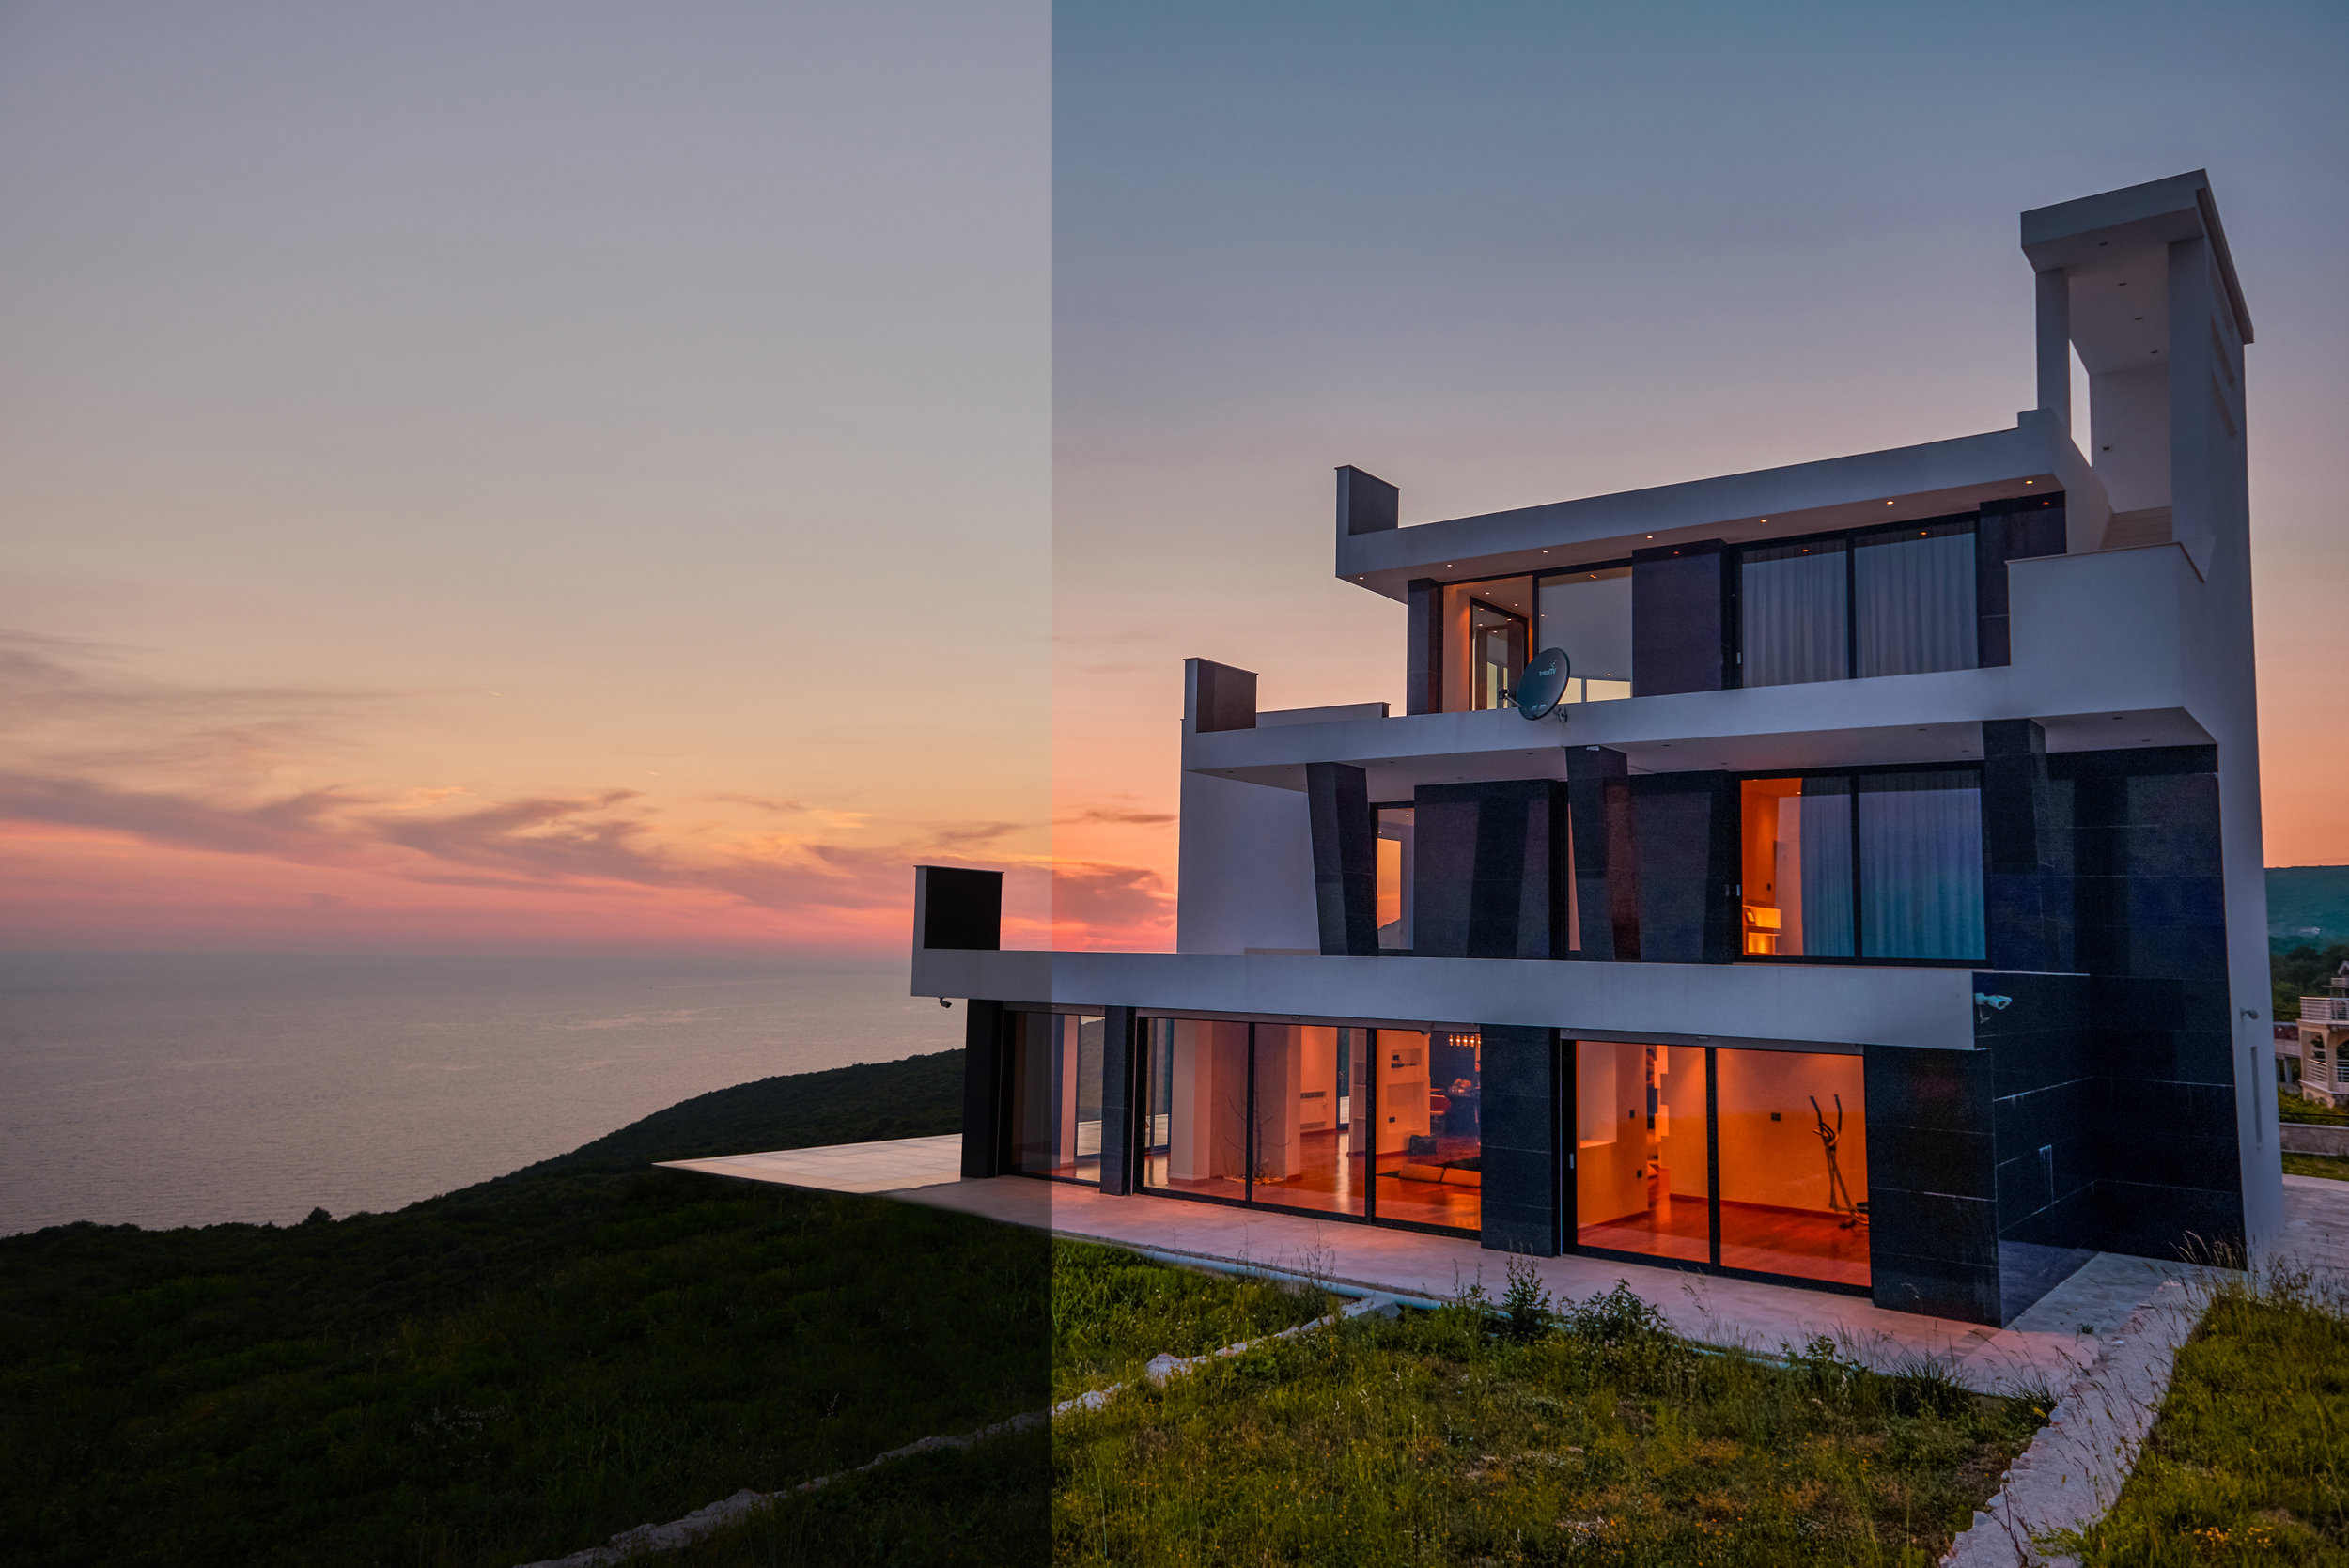
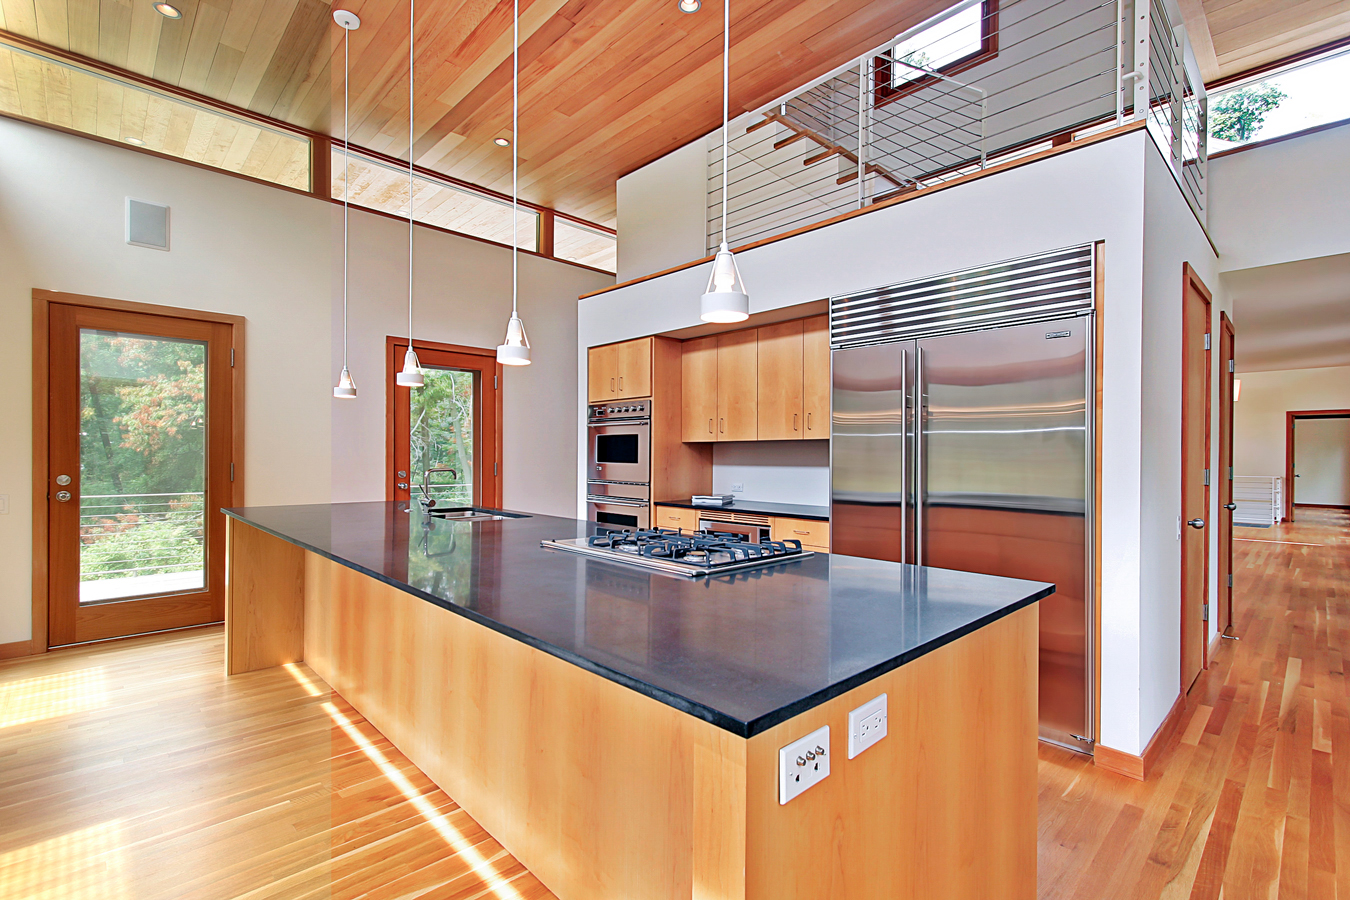
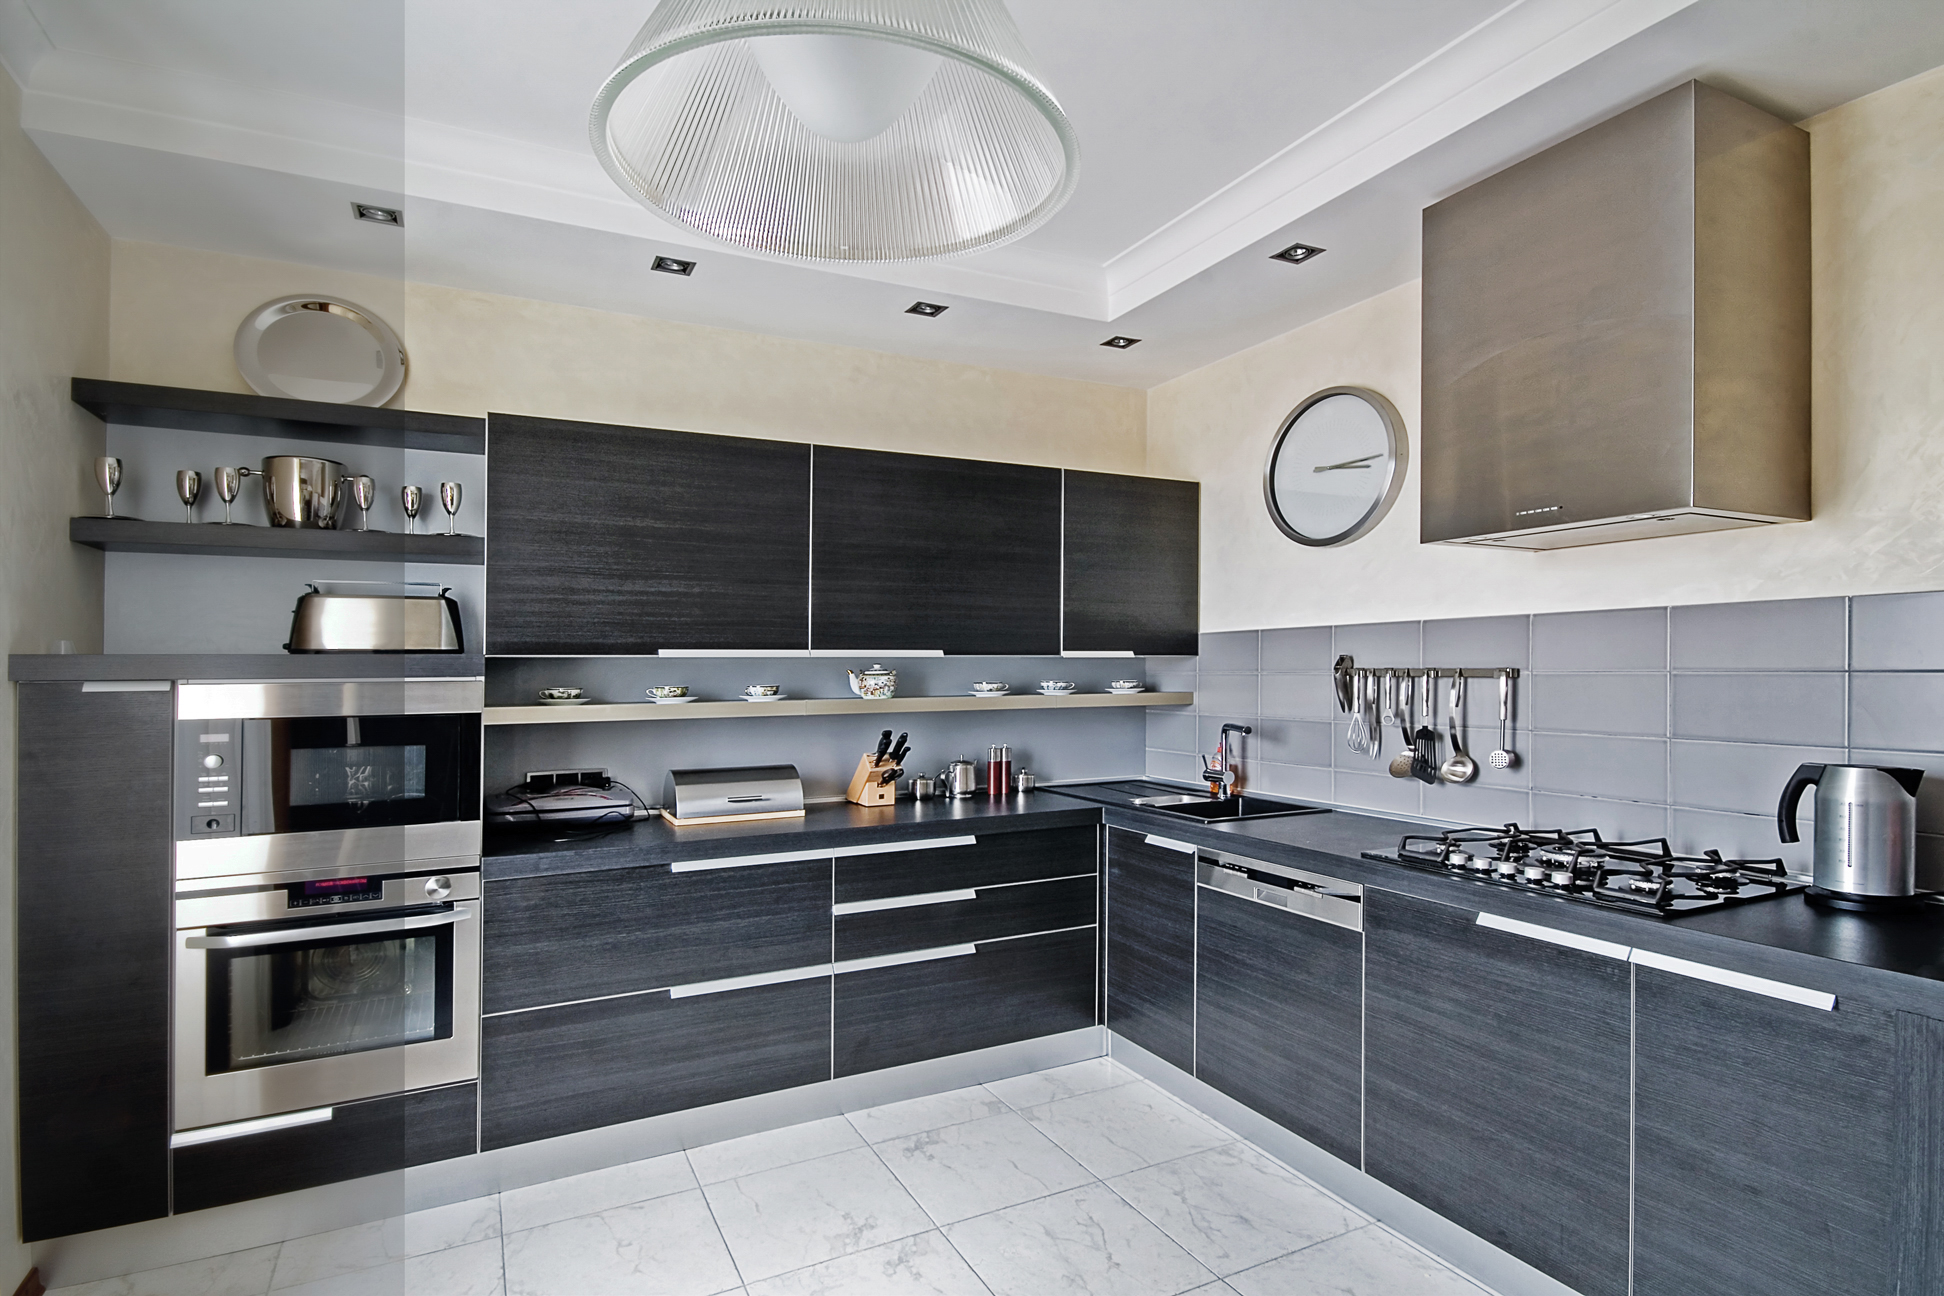
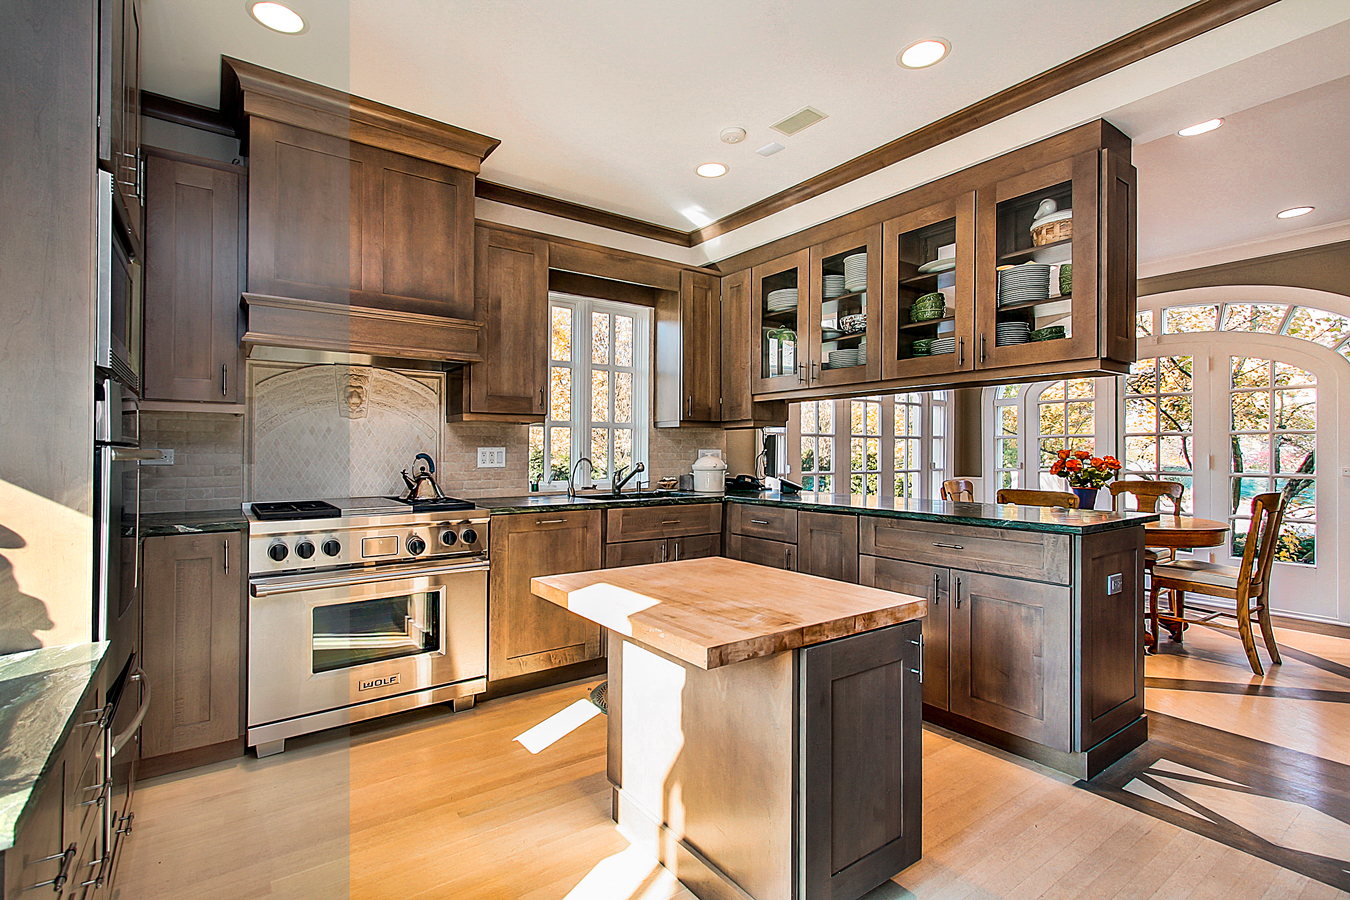
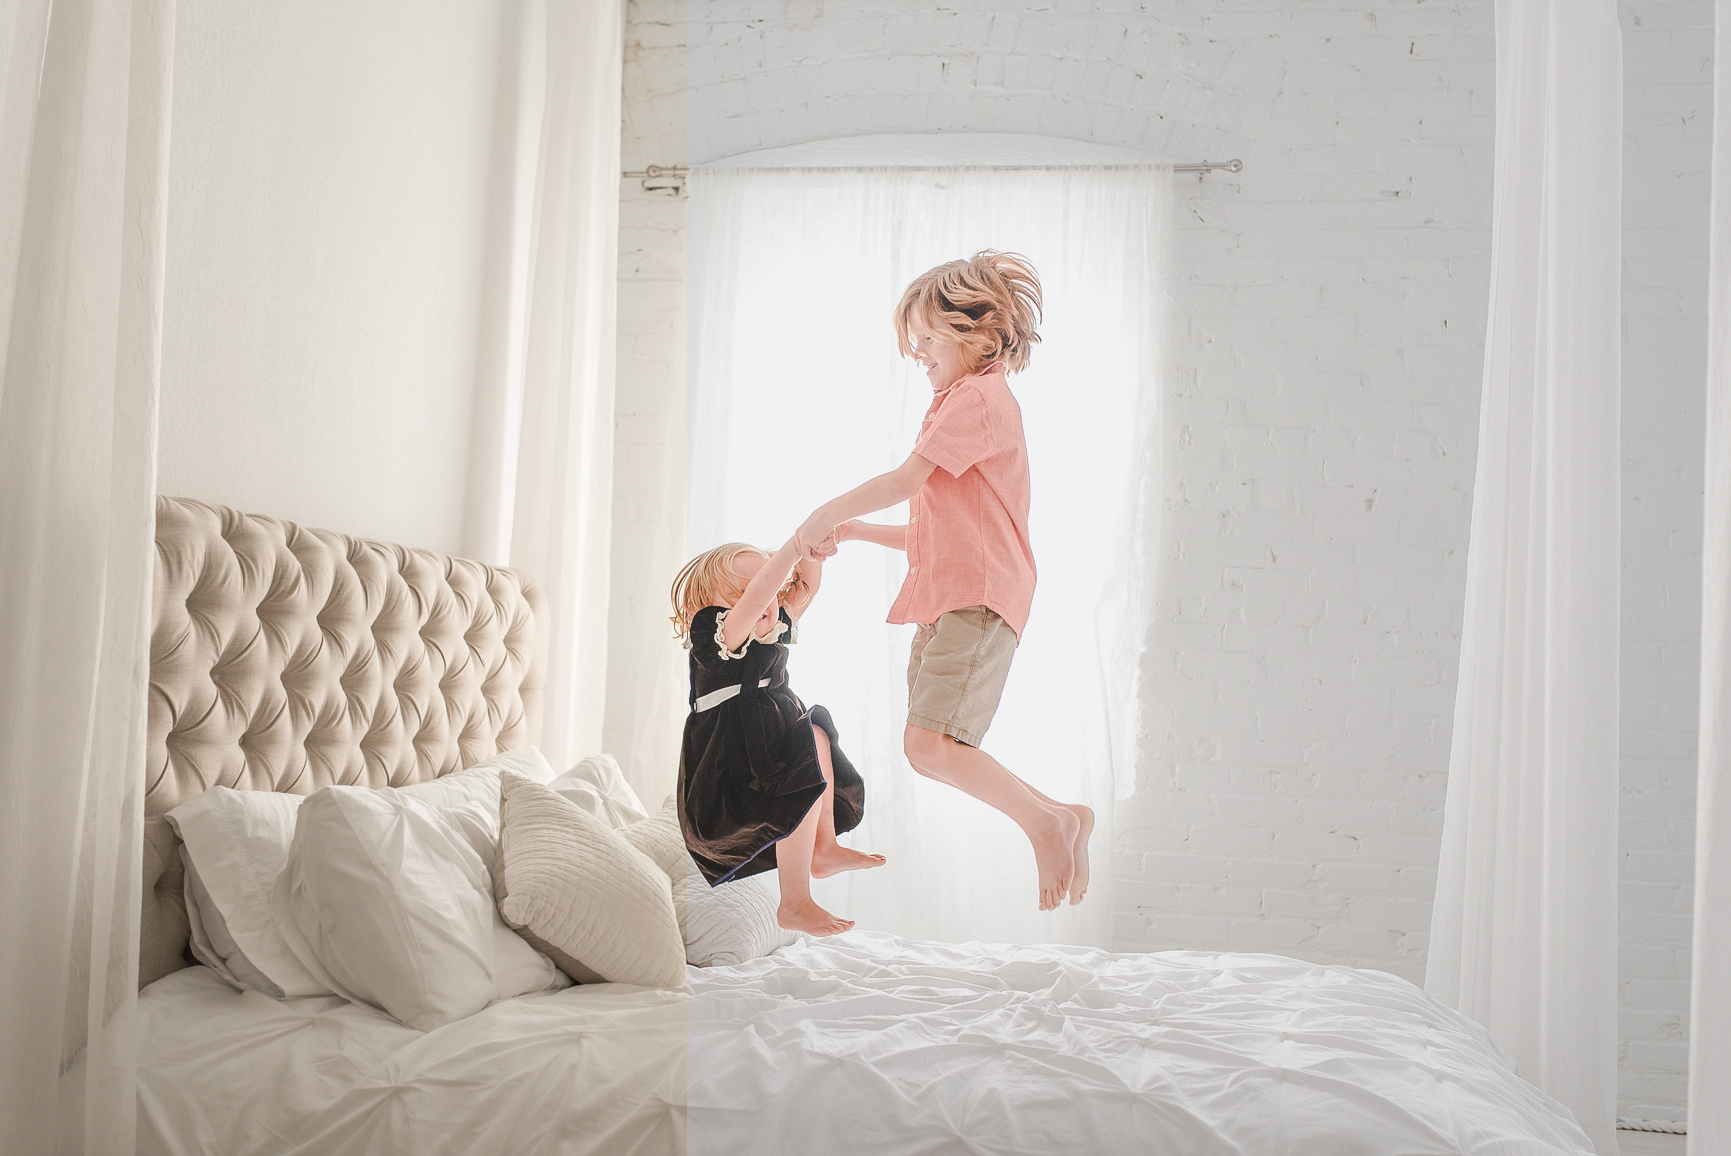
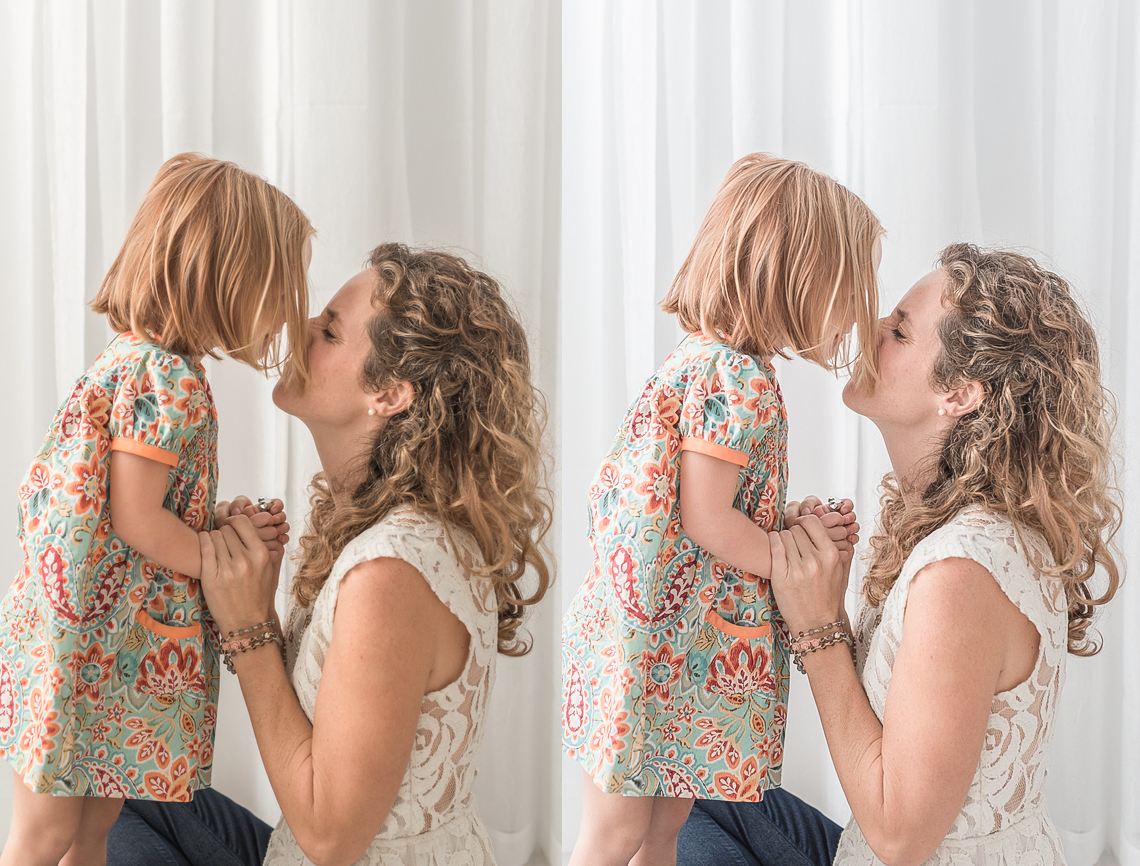
I am so happy to be able to share one of my latest creations for Lightroom & Photoshop ACR. We have had a Polaroid Land Camera for about 5 years and have been using Fuji 100 C Film with our camera. I have always been fascinated with instant film and collecting cameras since I started photography.

My favorite Fuji 100 C Film has just sky rocked to in Price to almost $50 per pack of 10 exposures so I haven't been shooting with it as much. I wanted to recreate the look of 100 C and Instax film in Lightroom/Photoshop so I could achieve a similar look with my DSLR images.

I am very happy with the outcome and these have been in the works for months. You can view the full description with before and afters in our SHOP

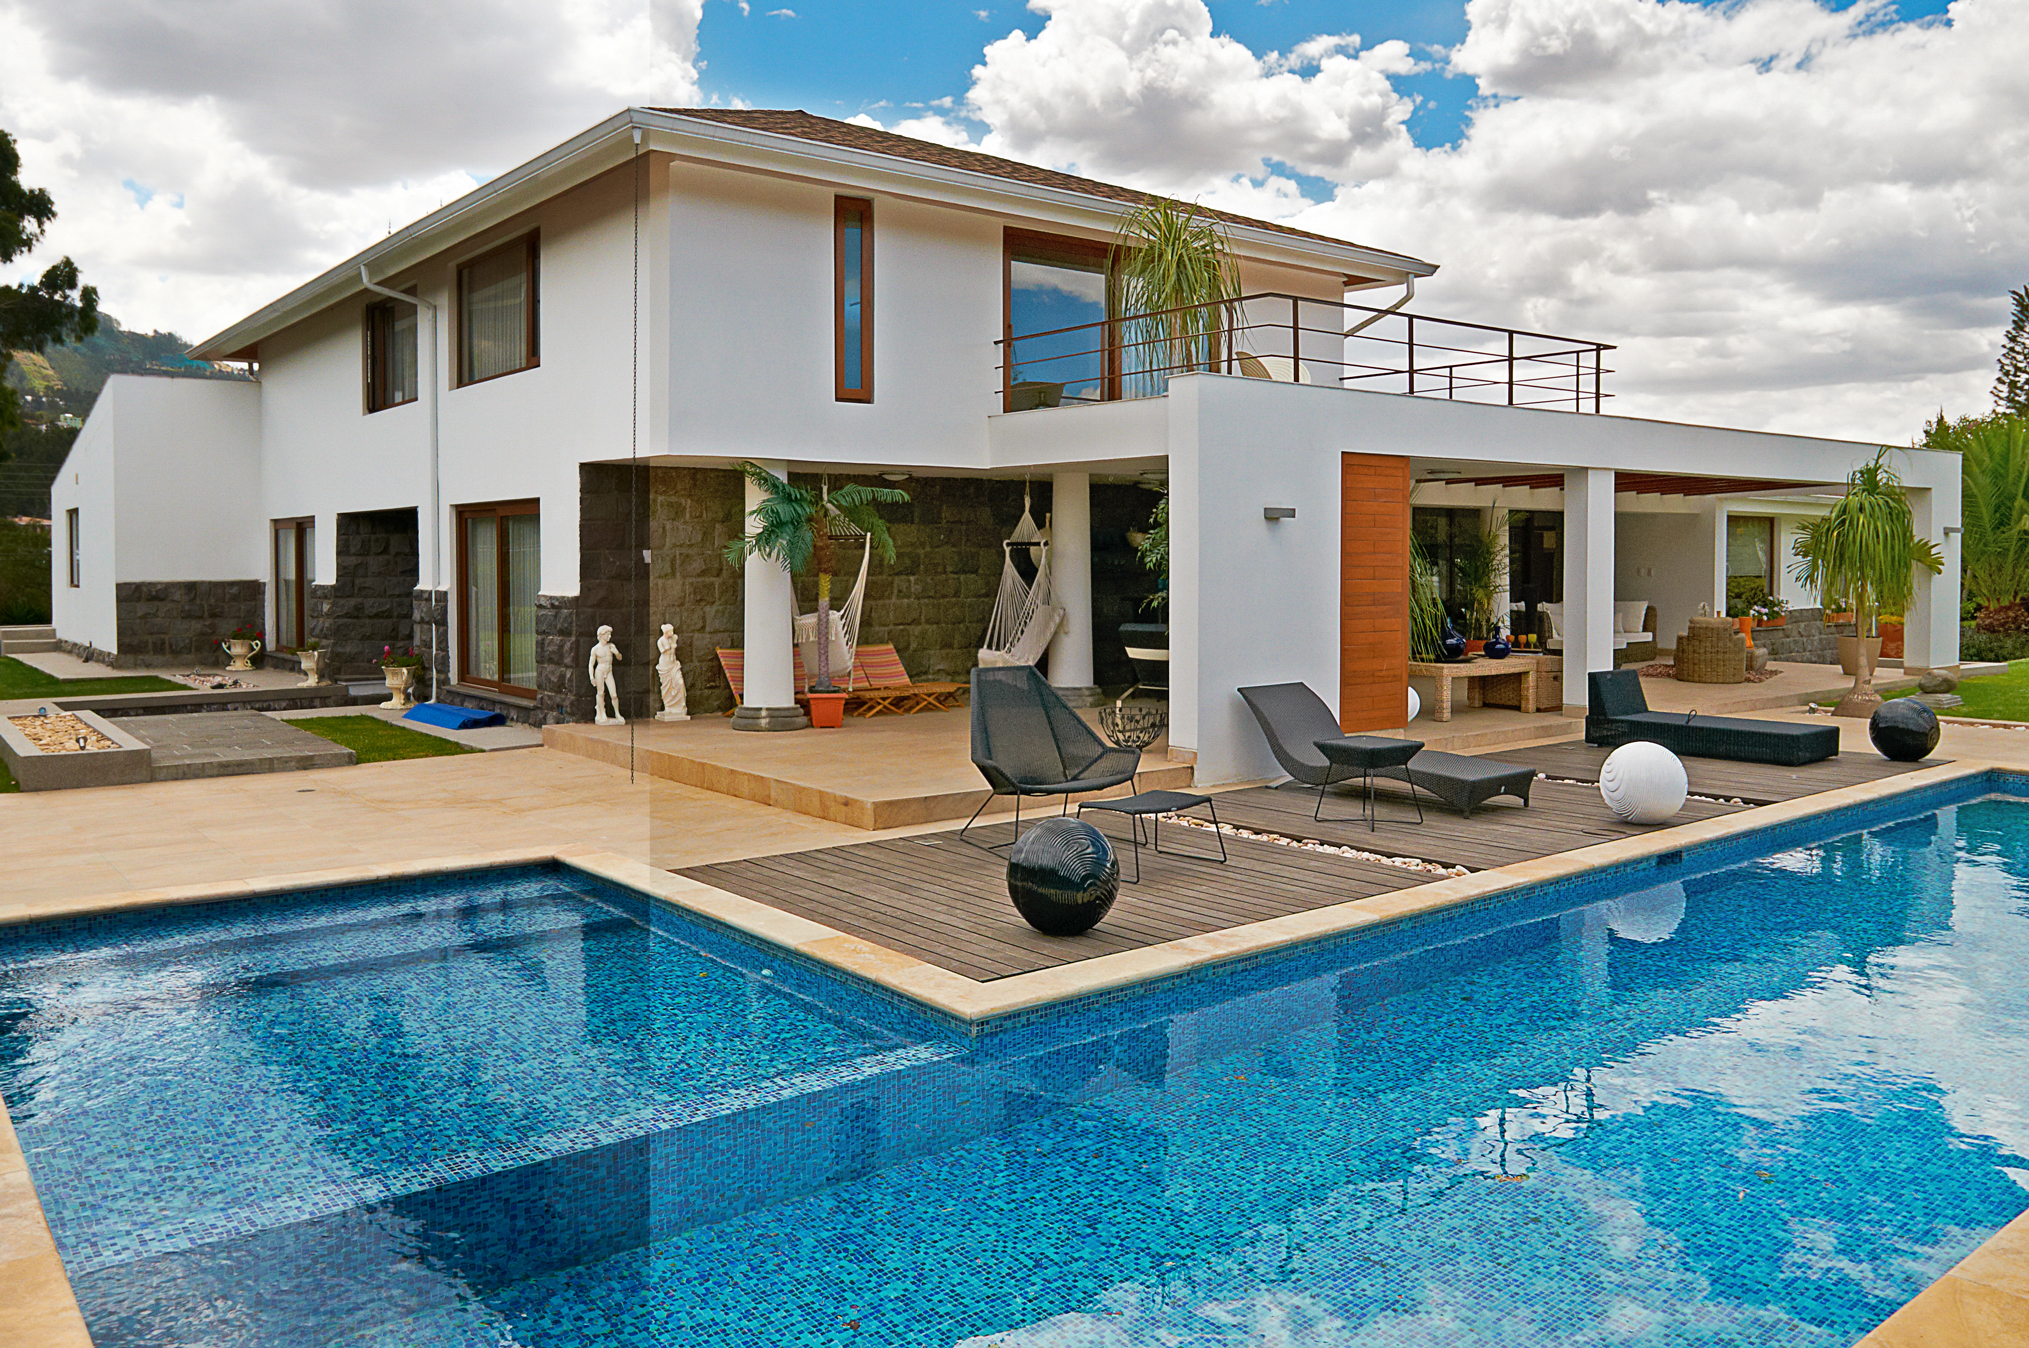
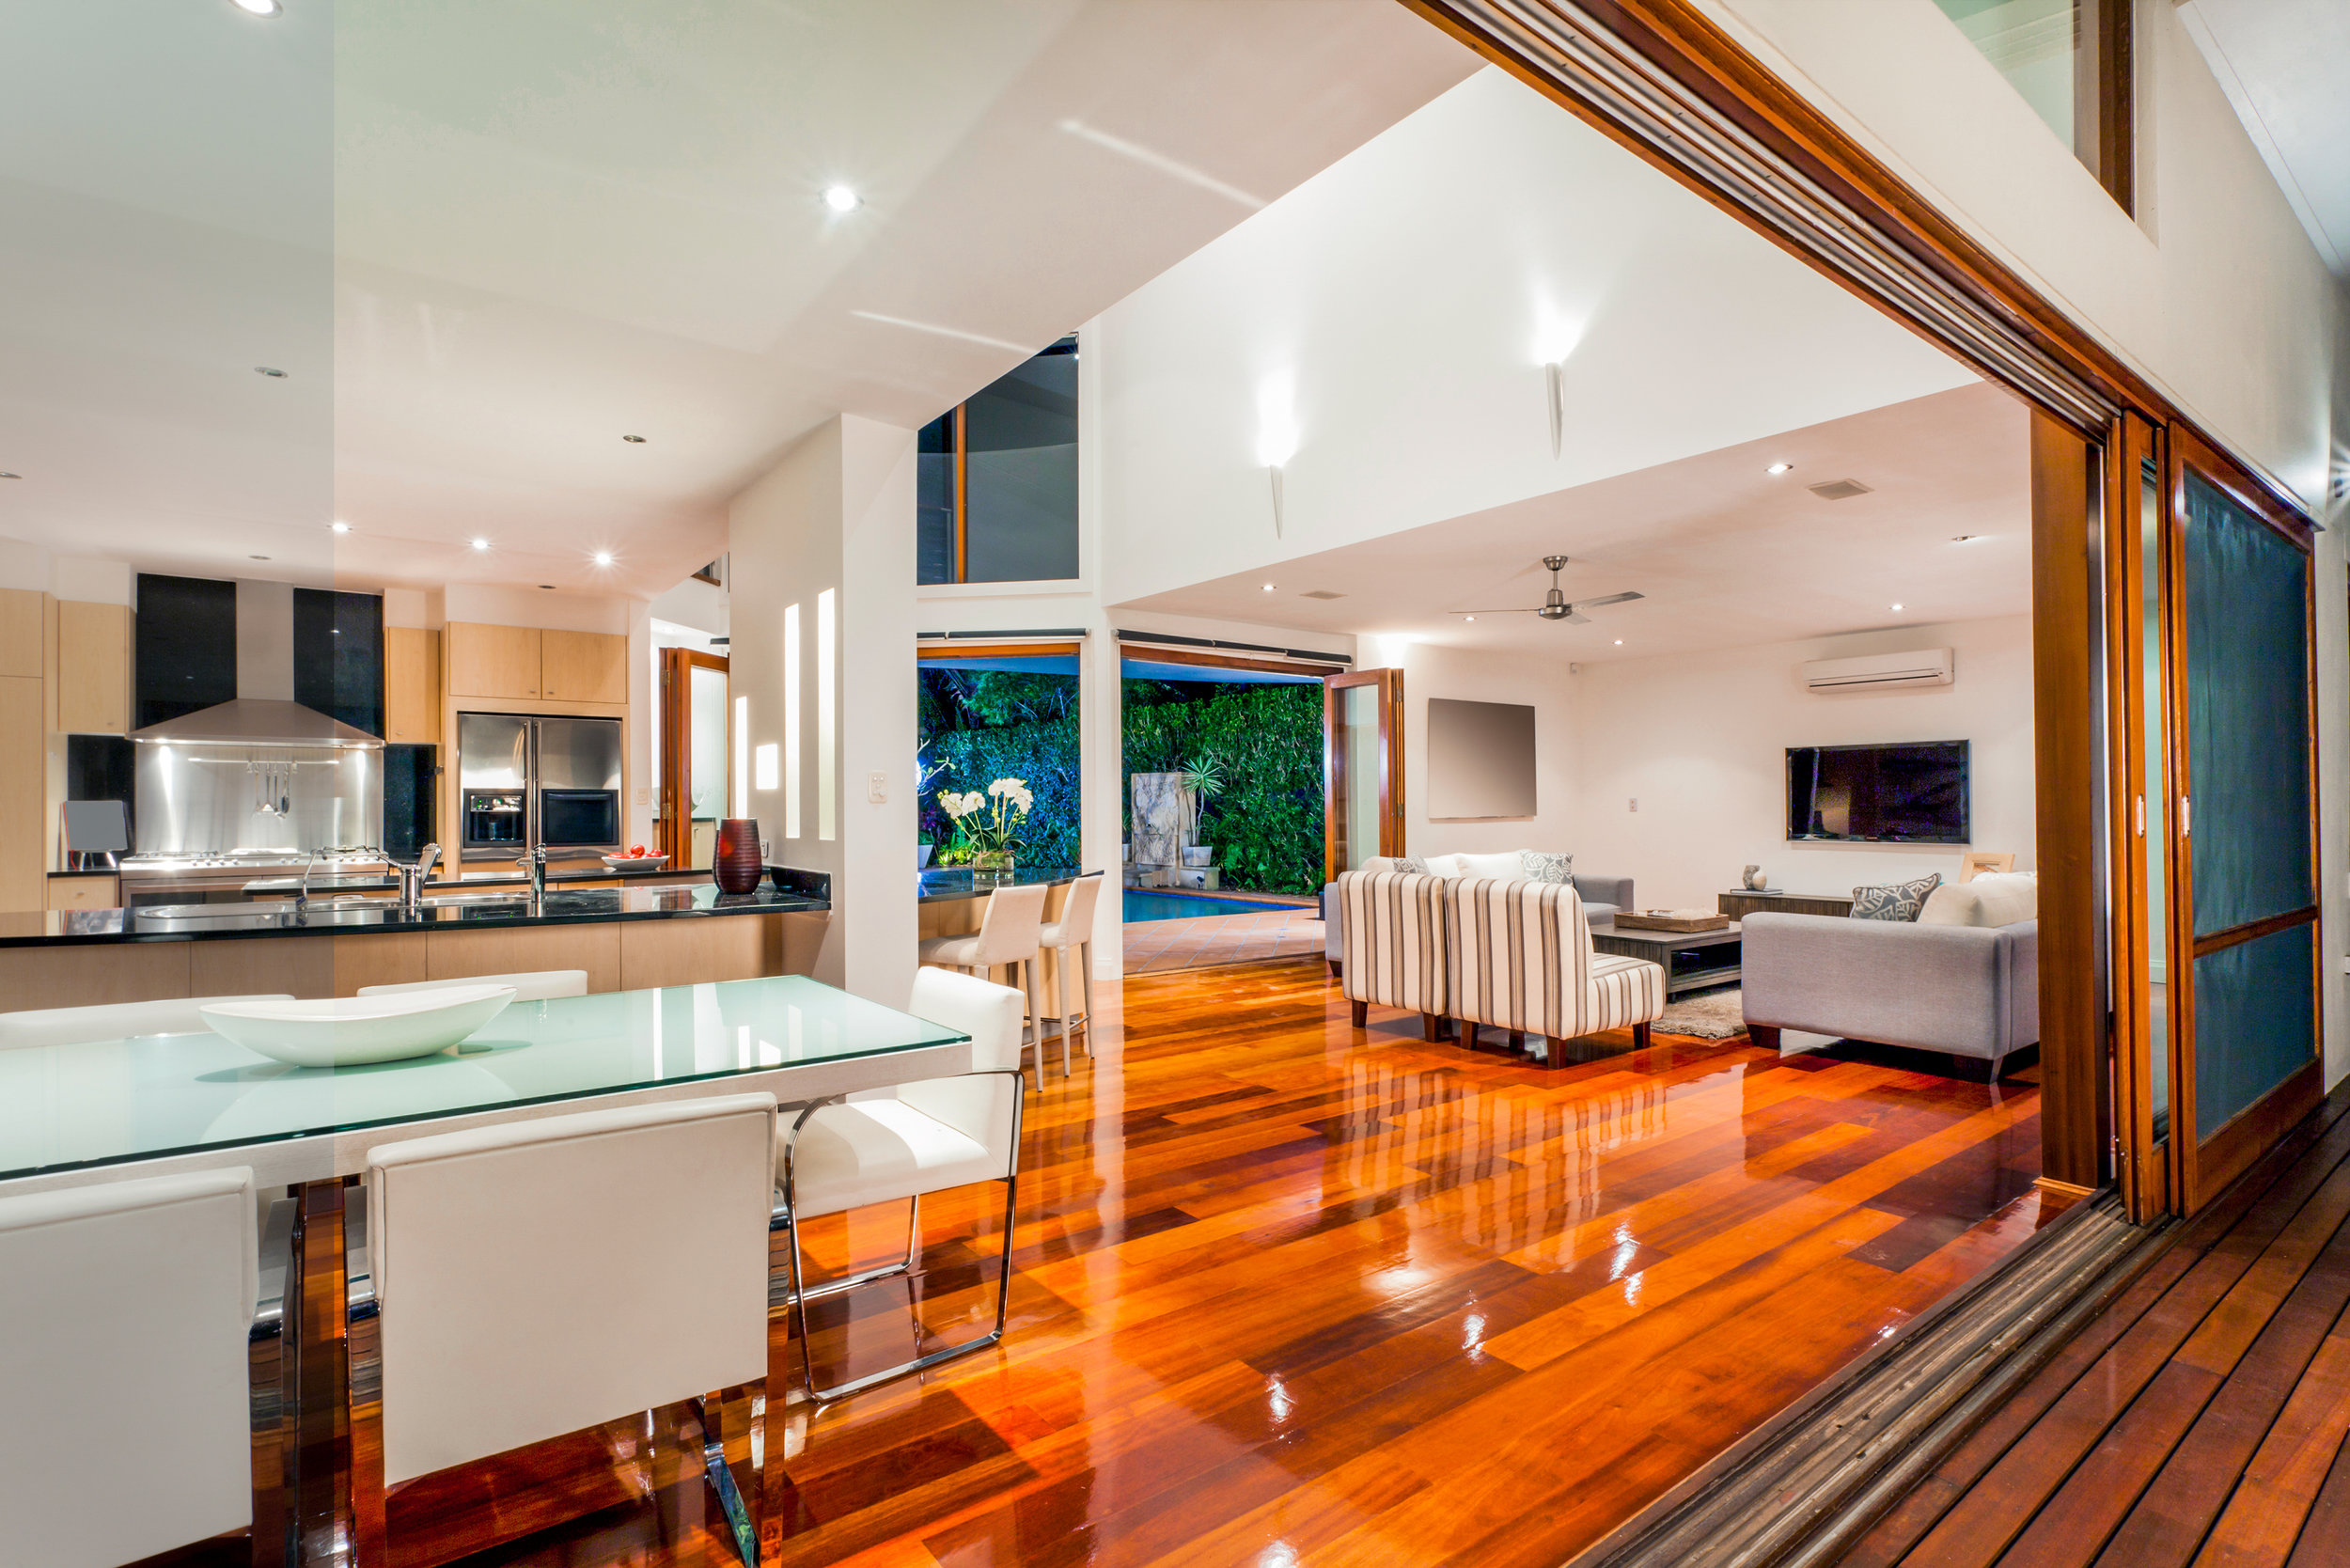
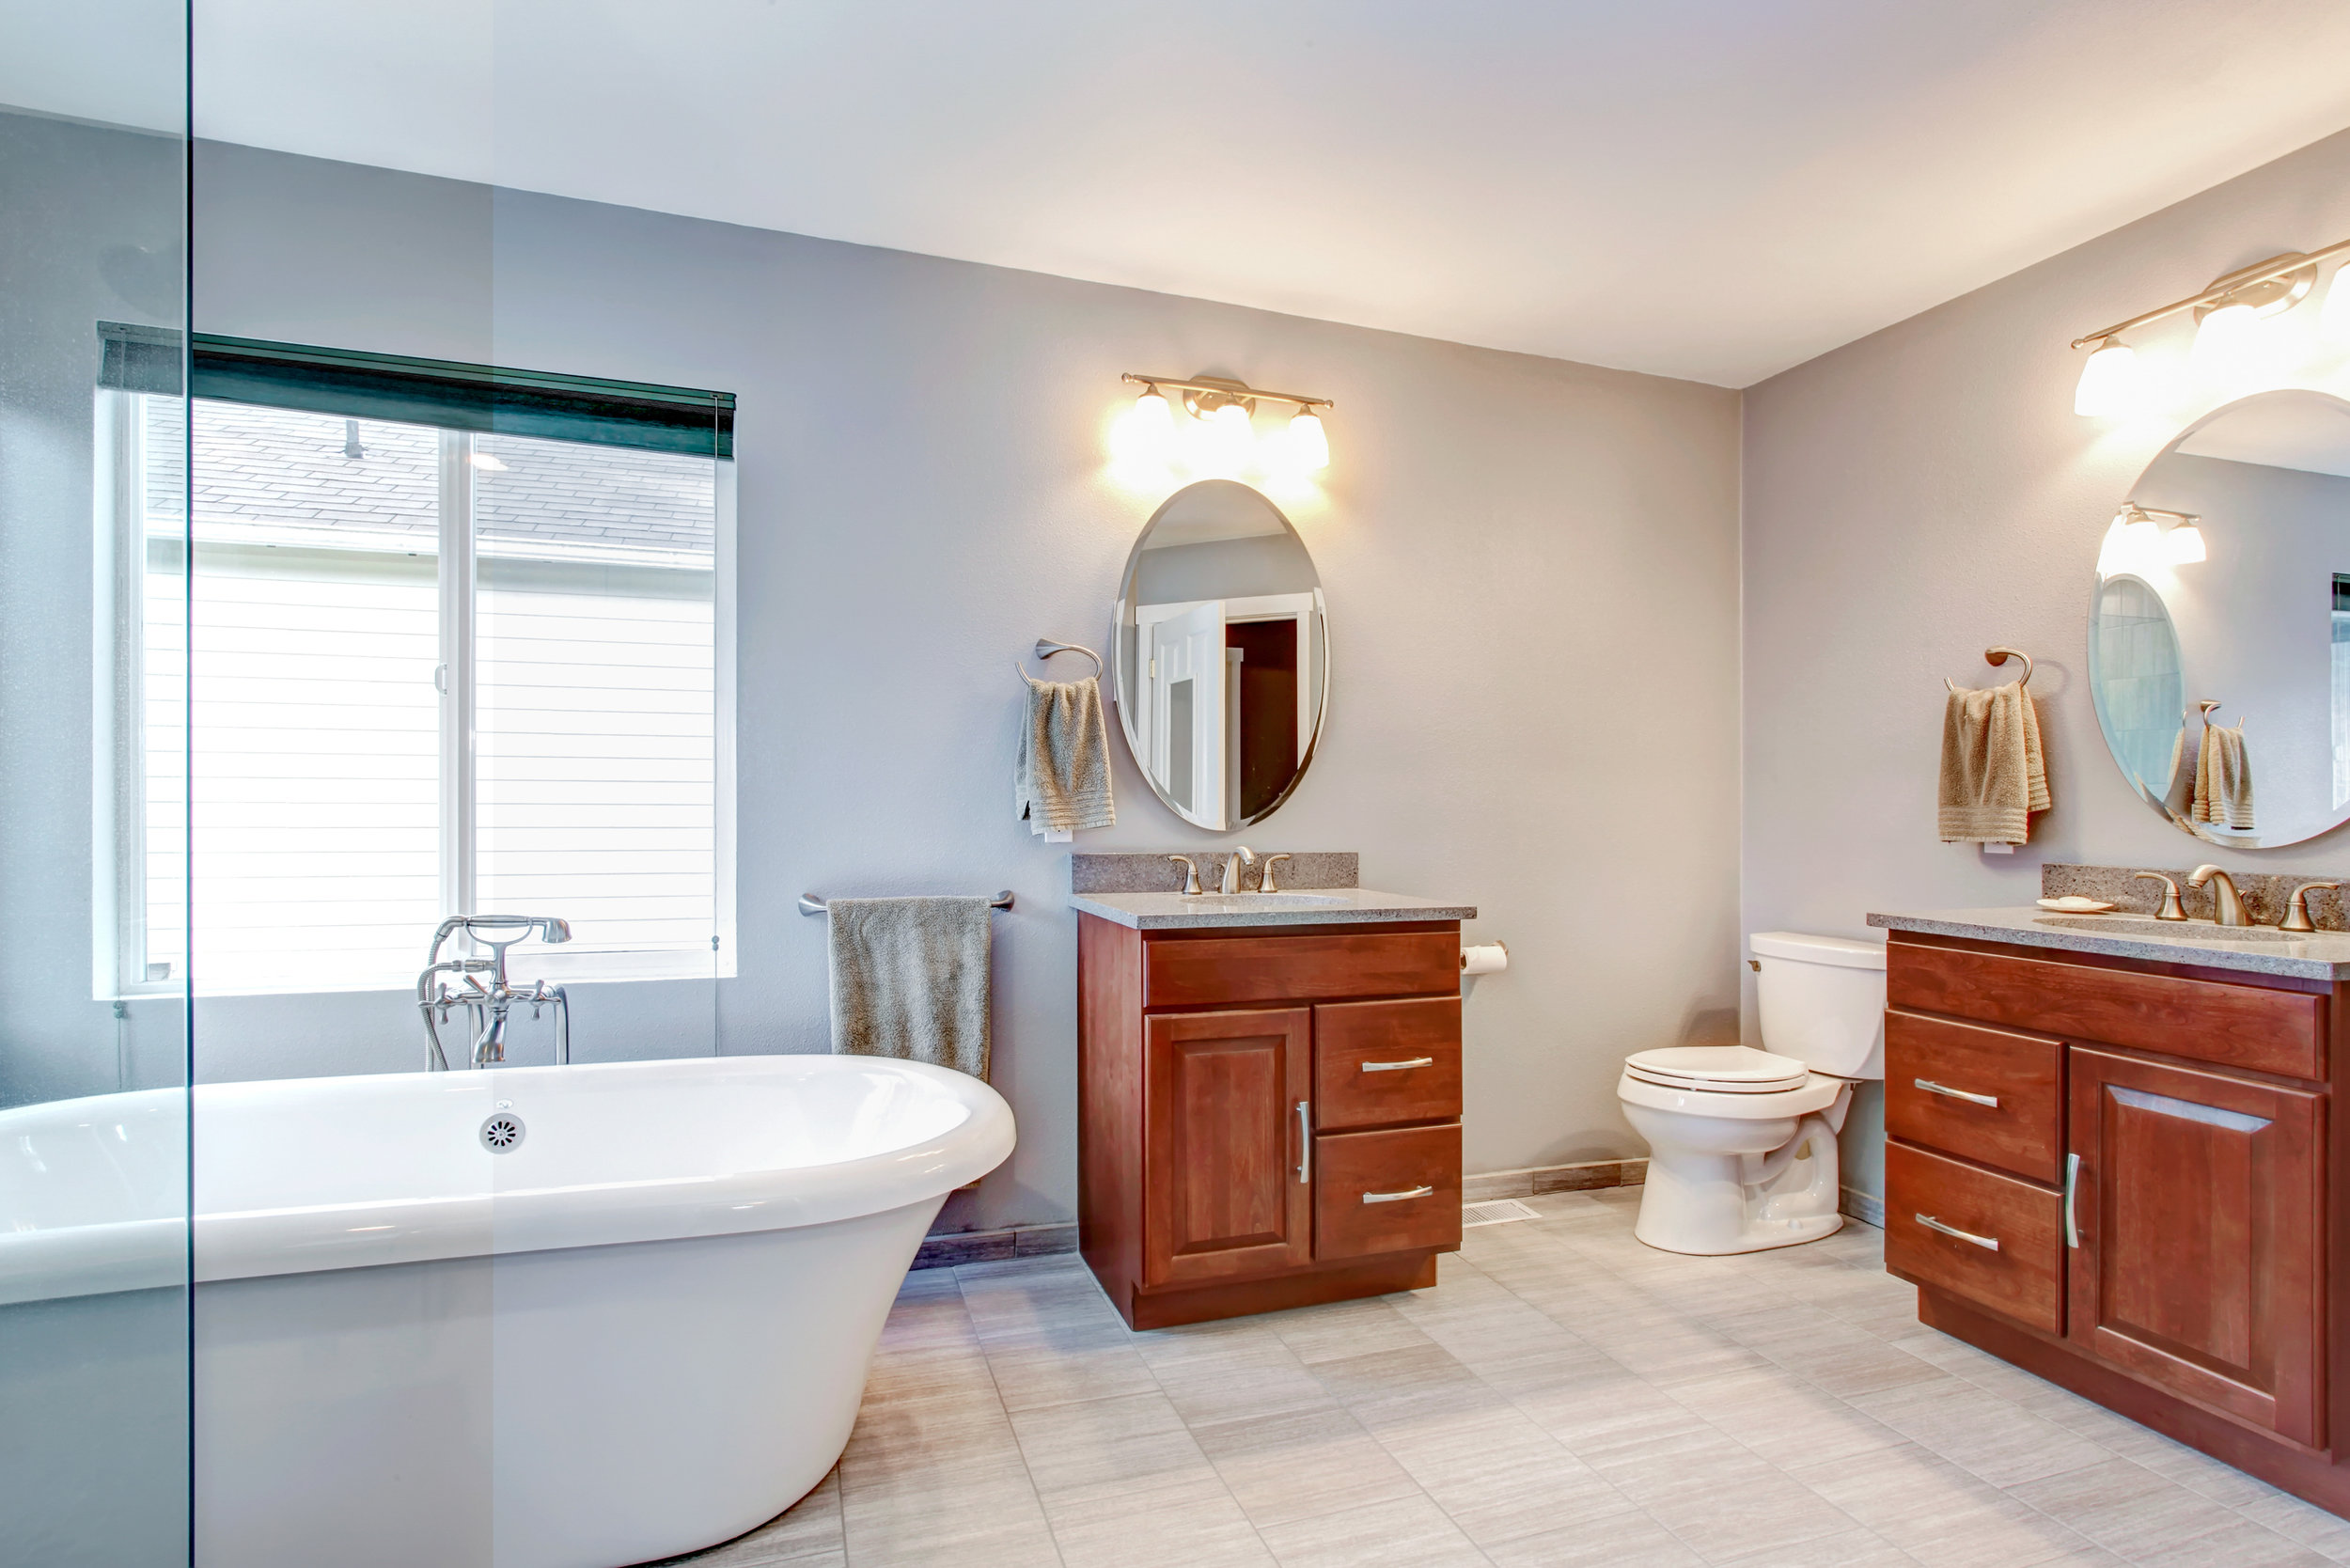
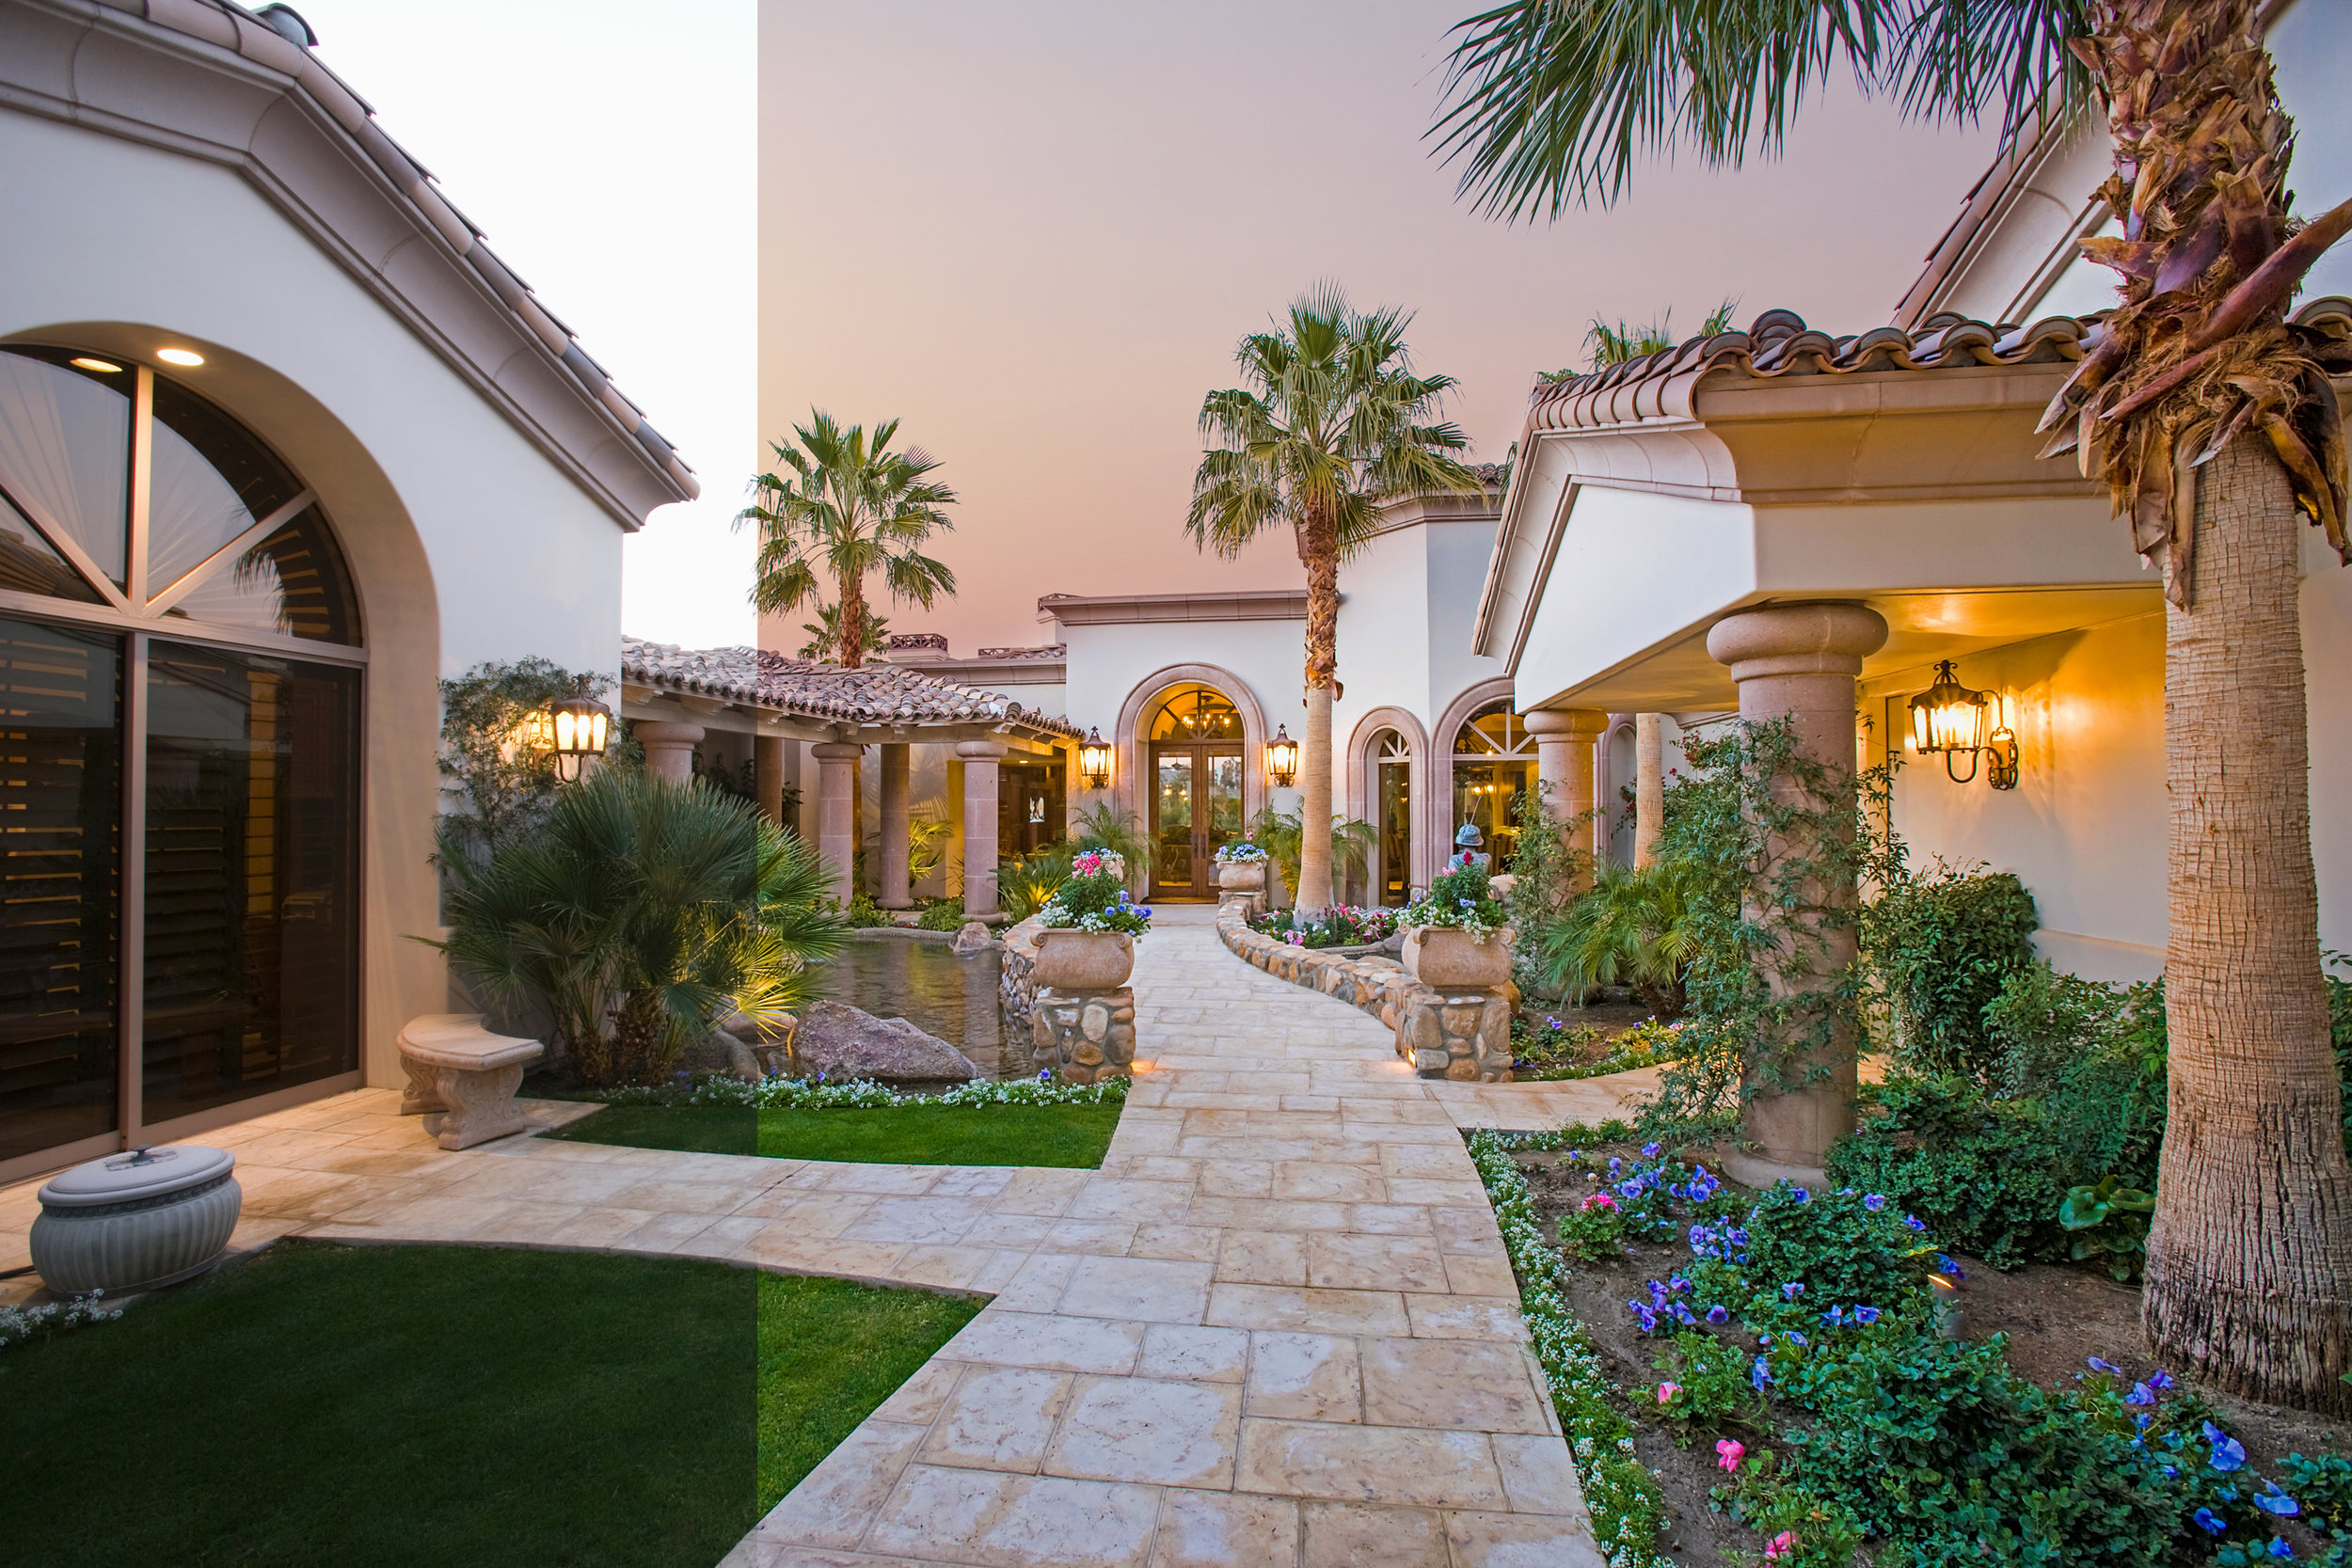
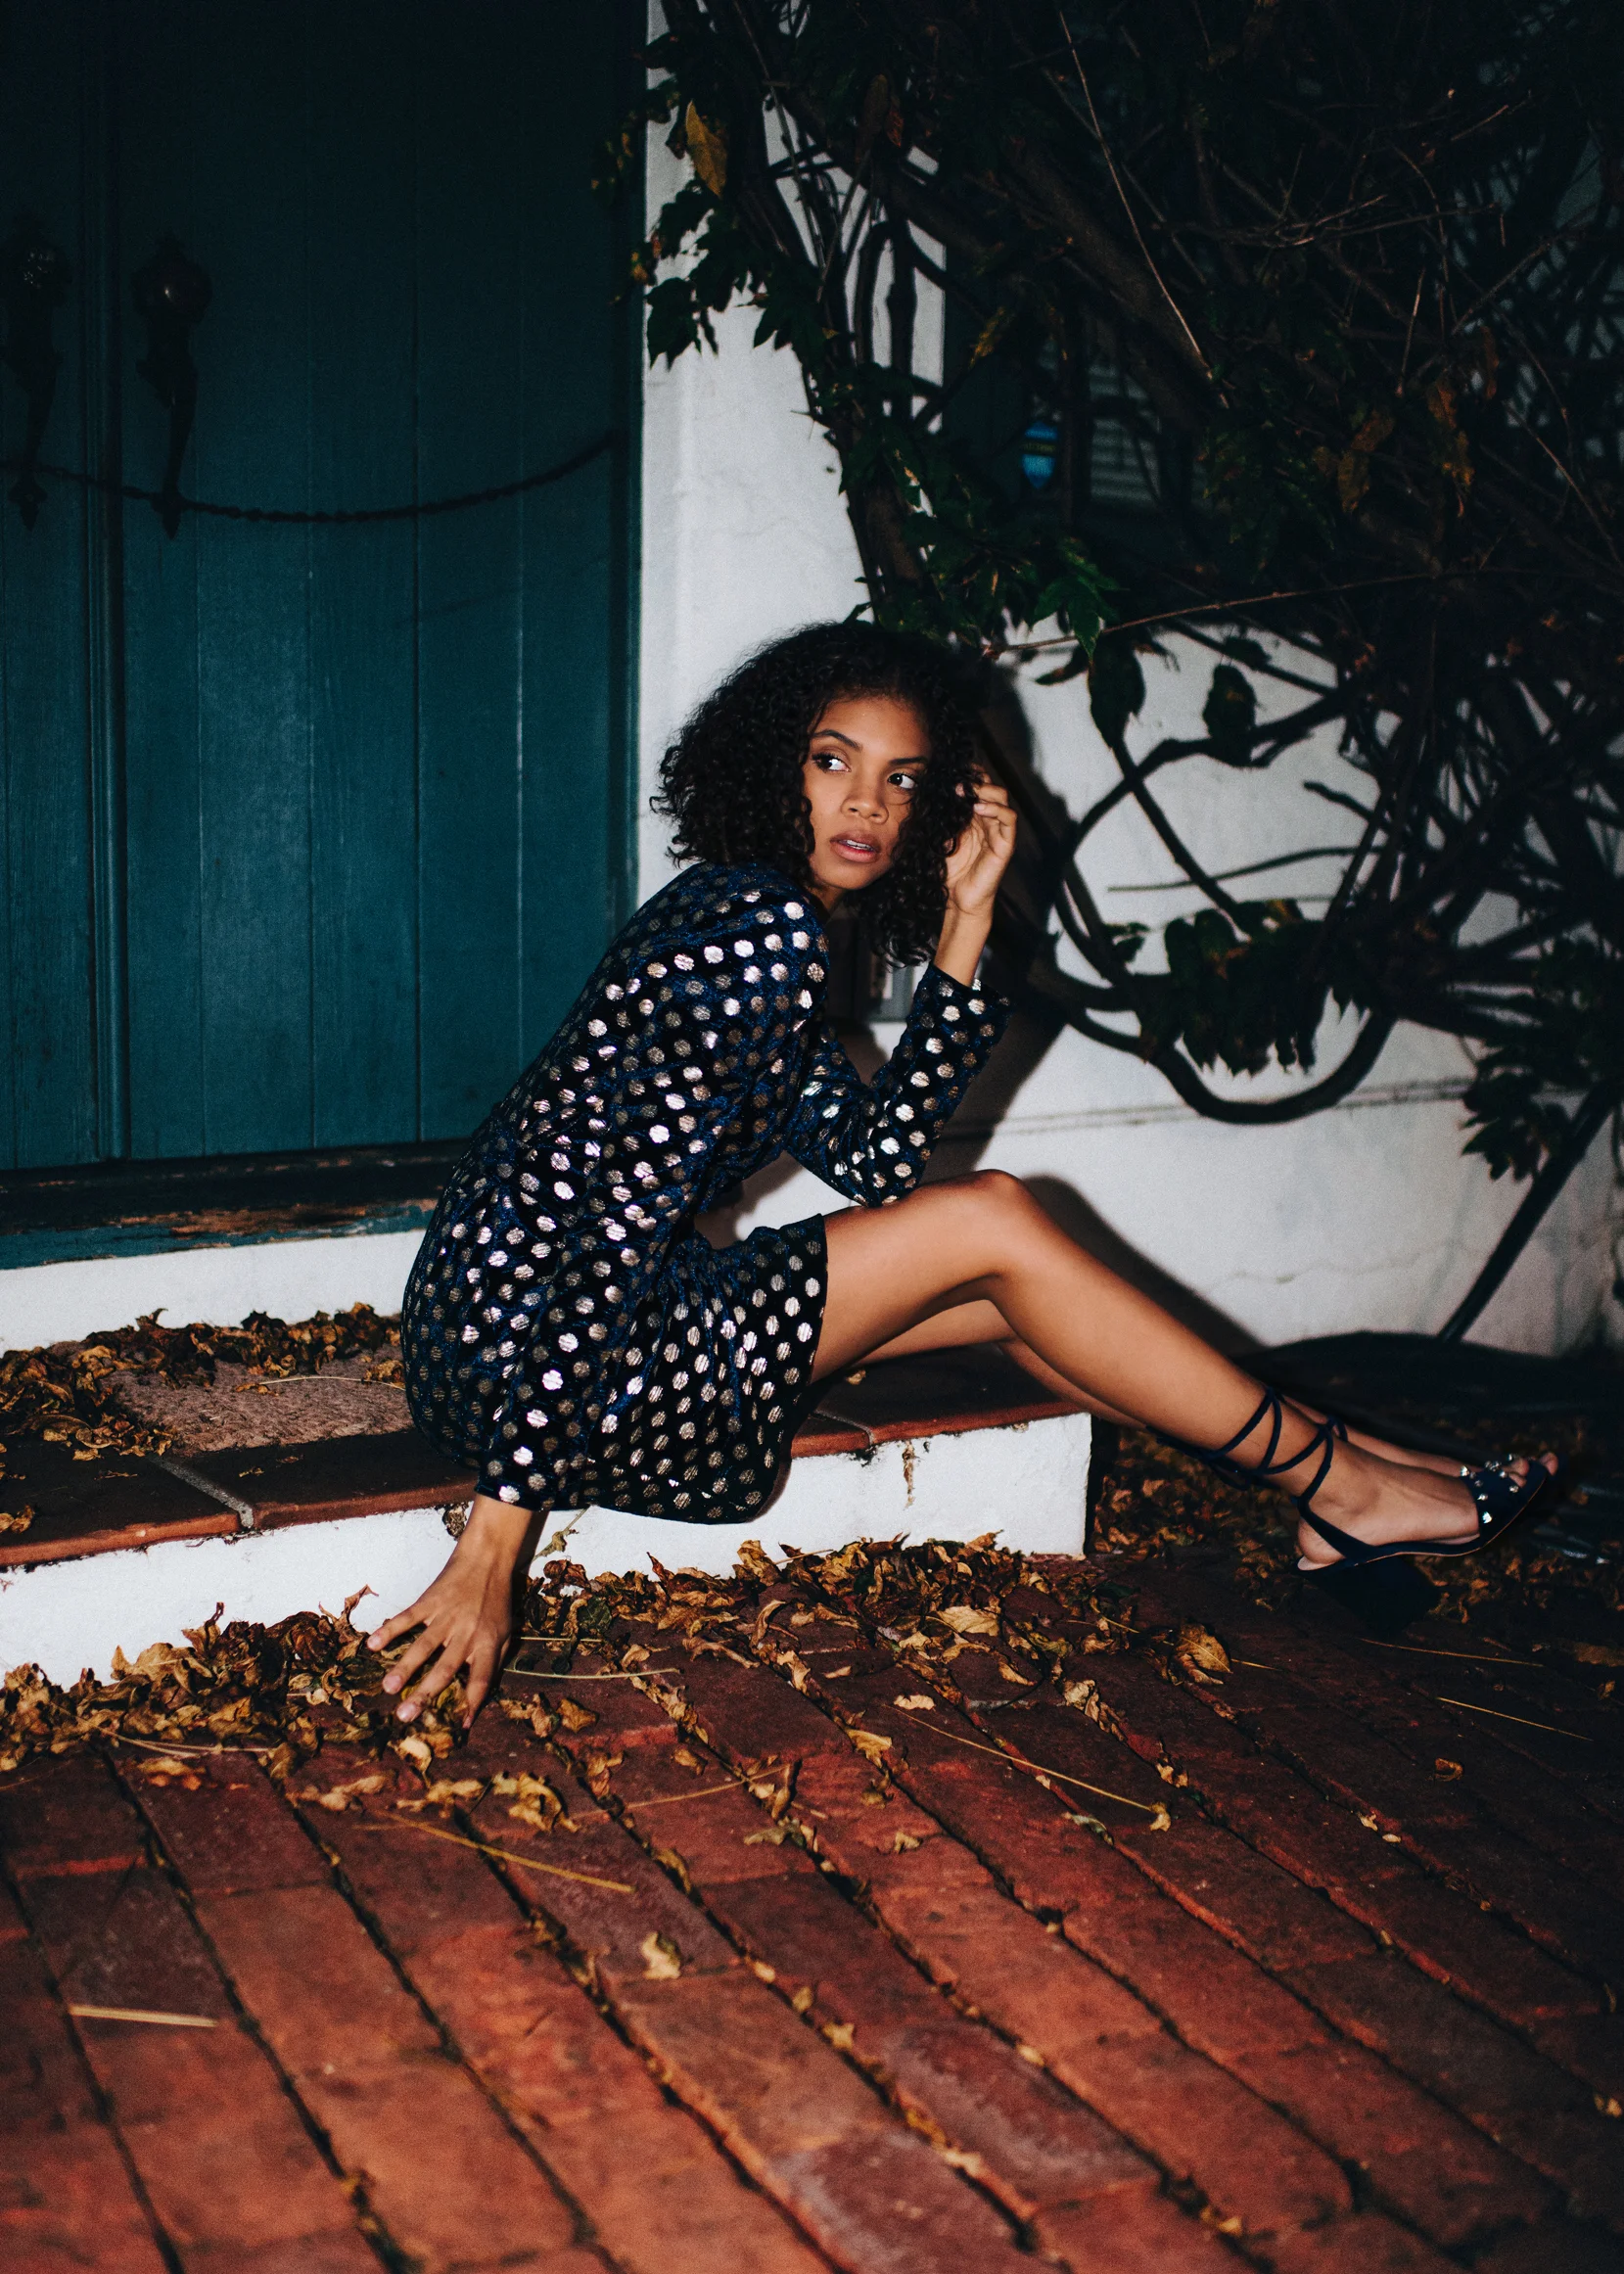
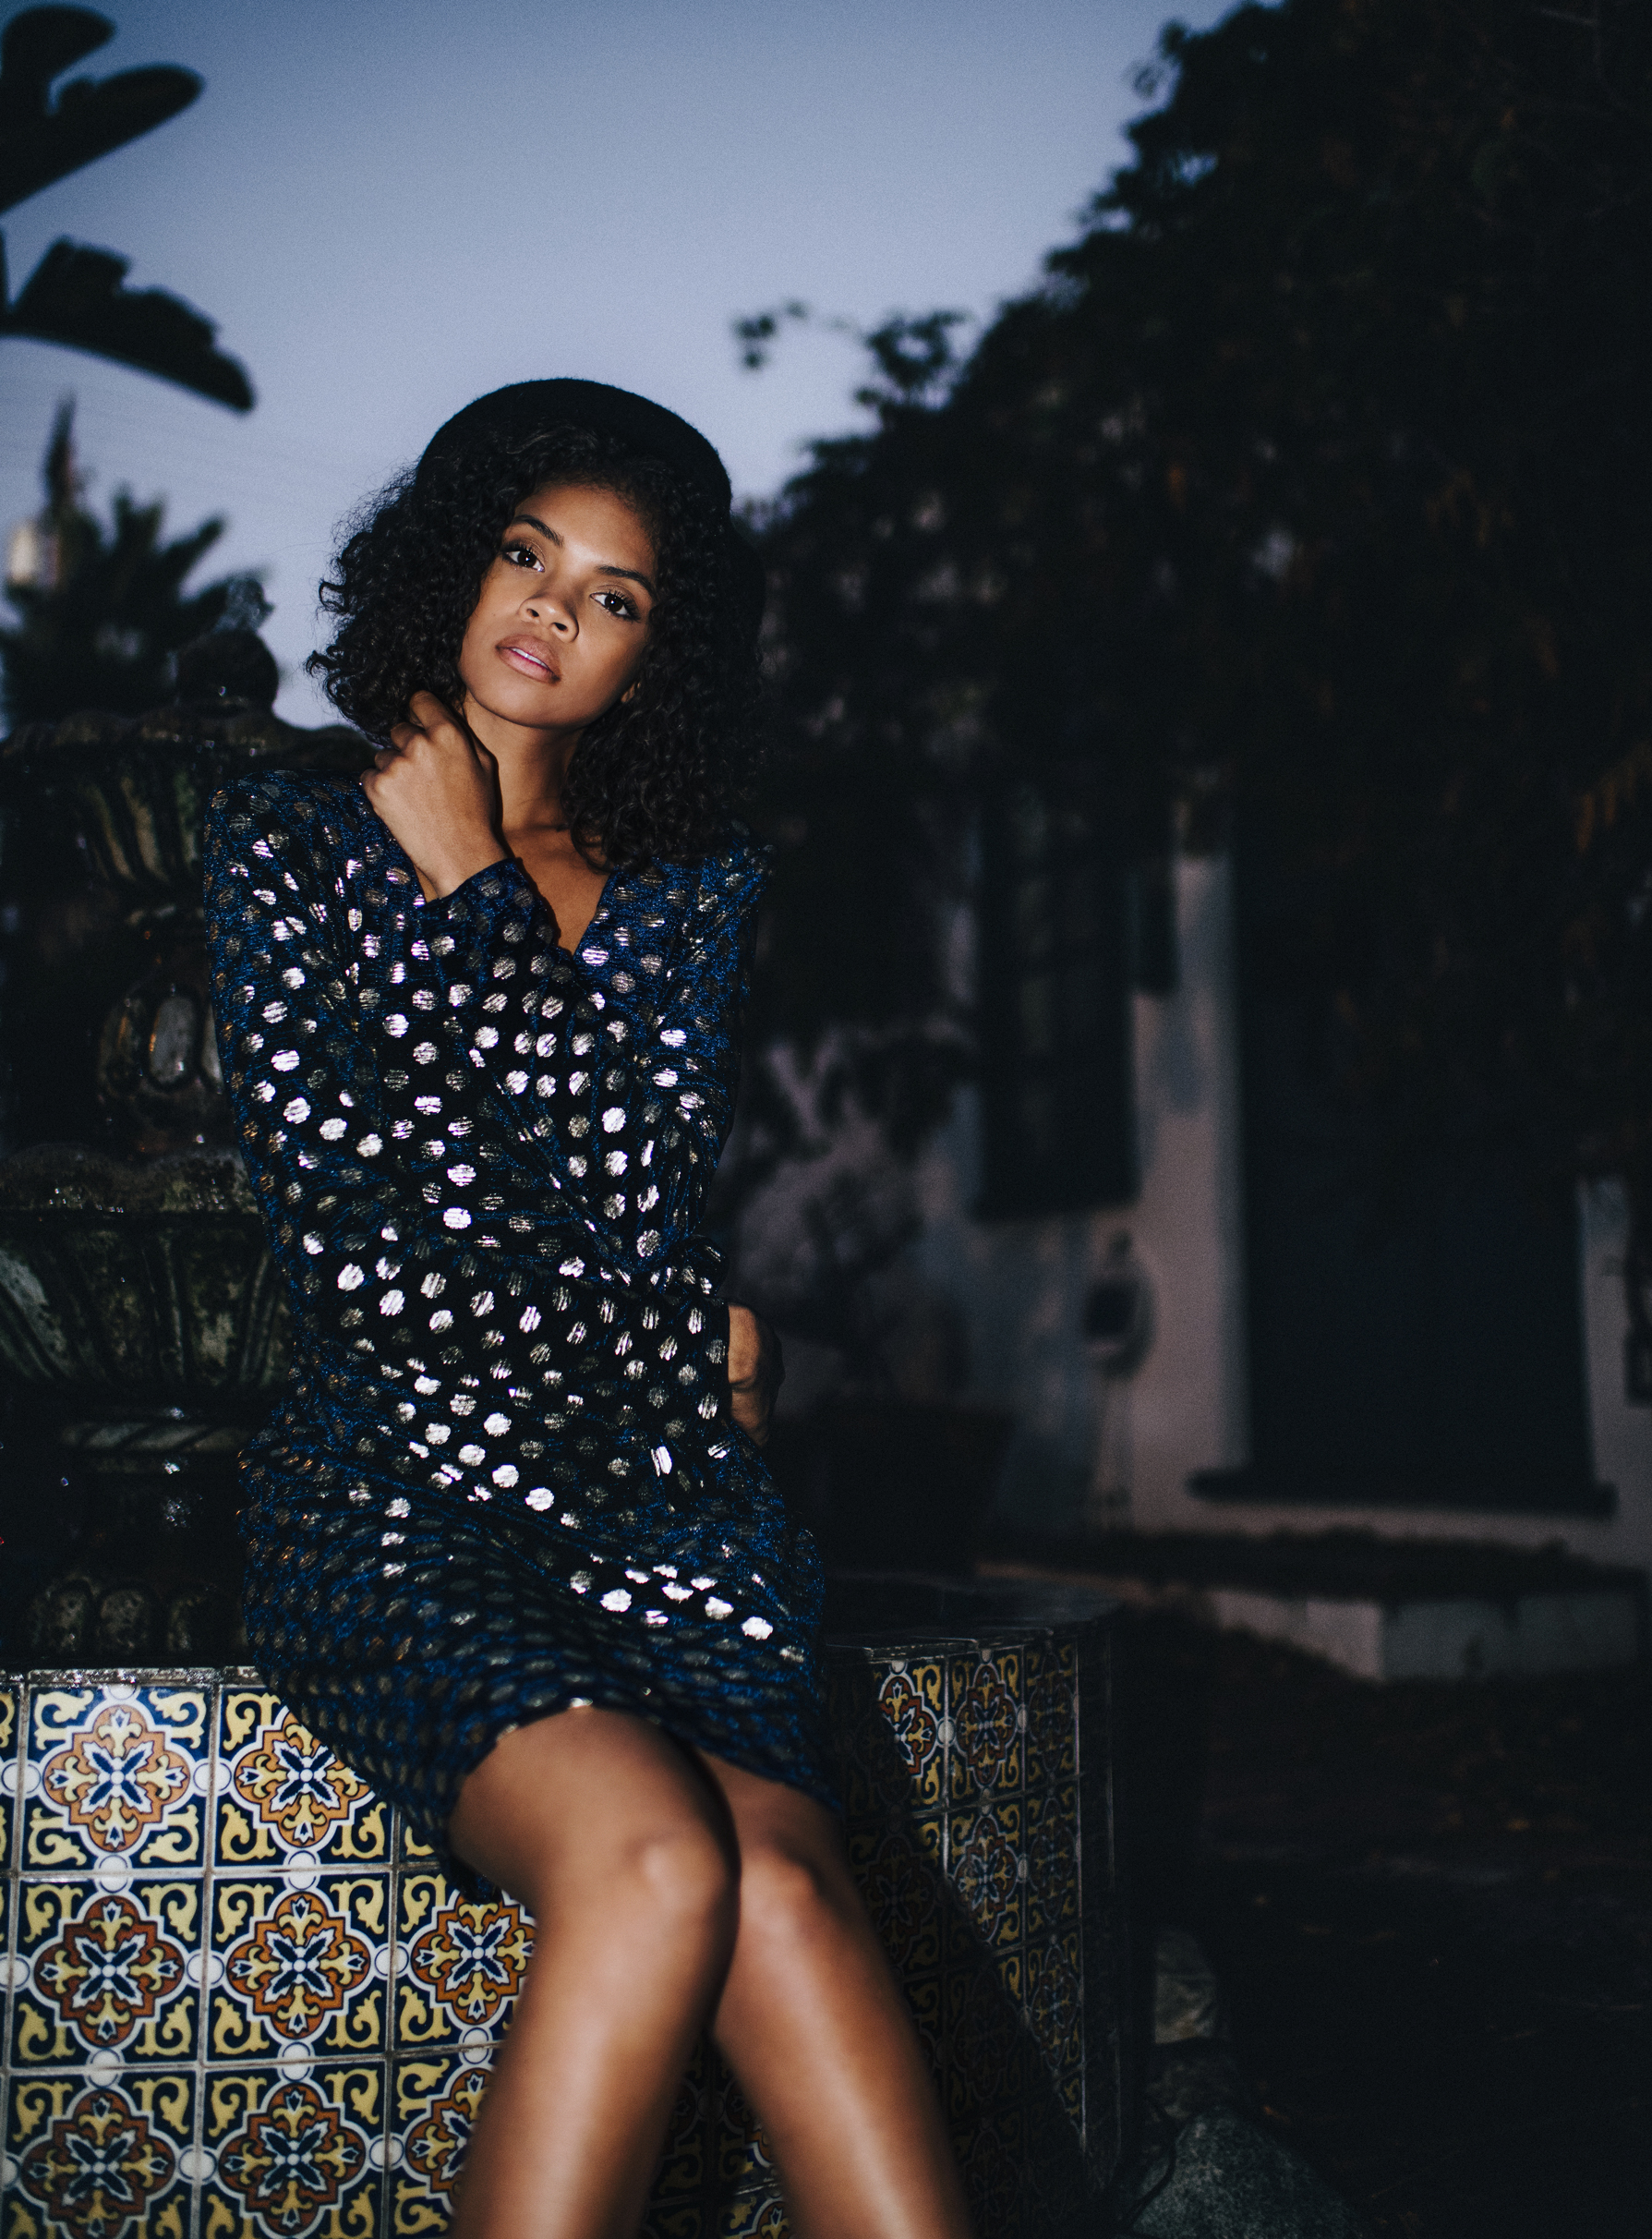
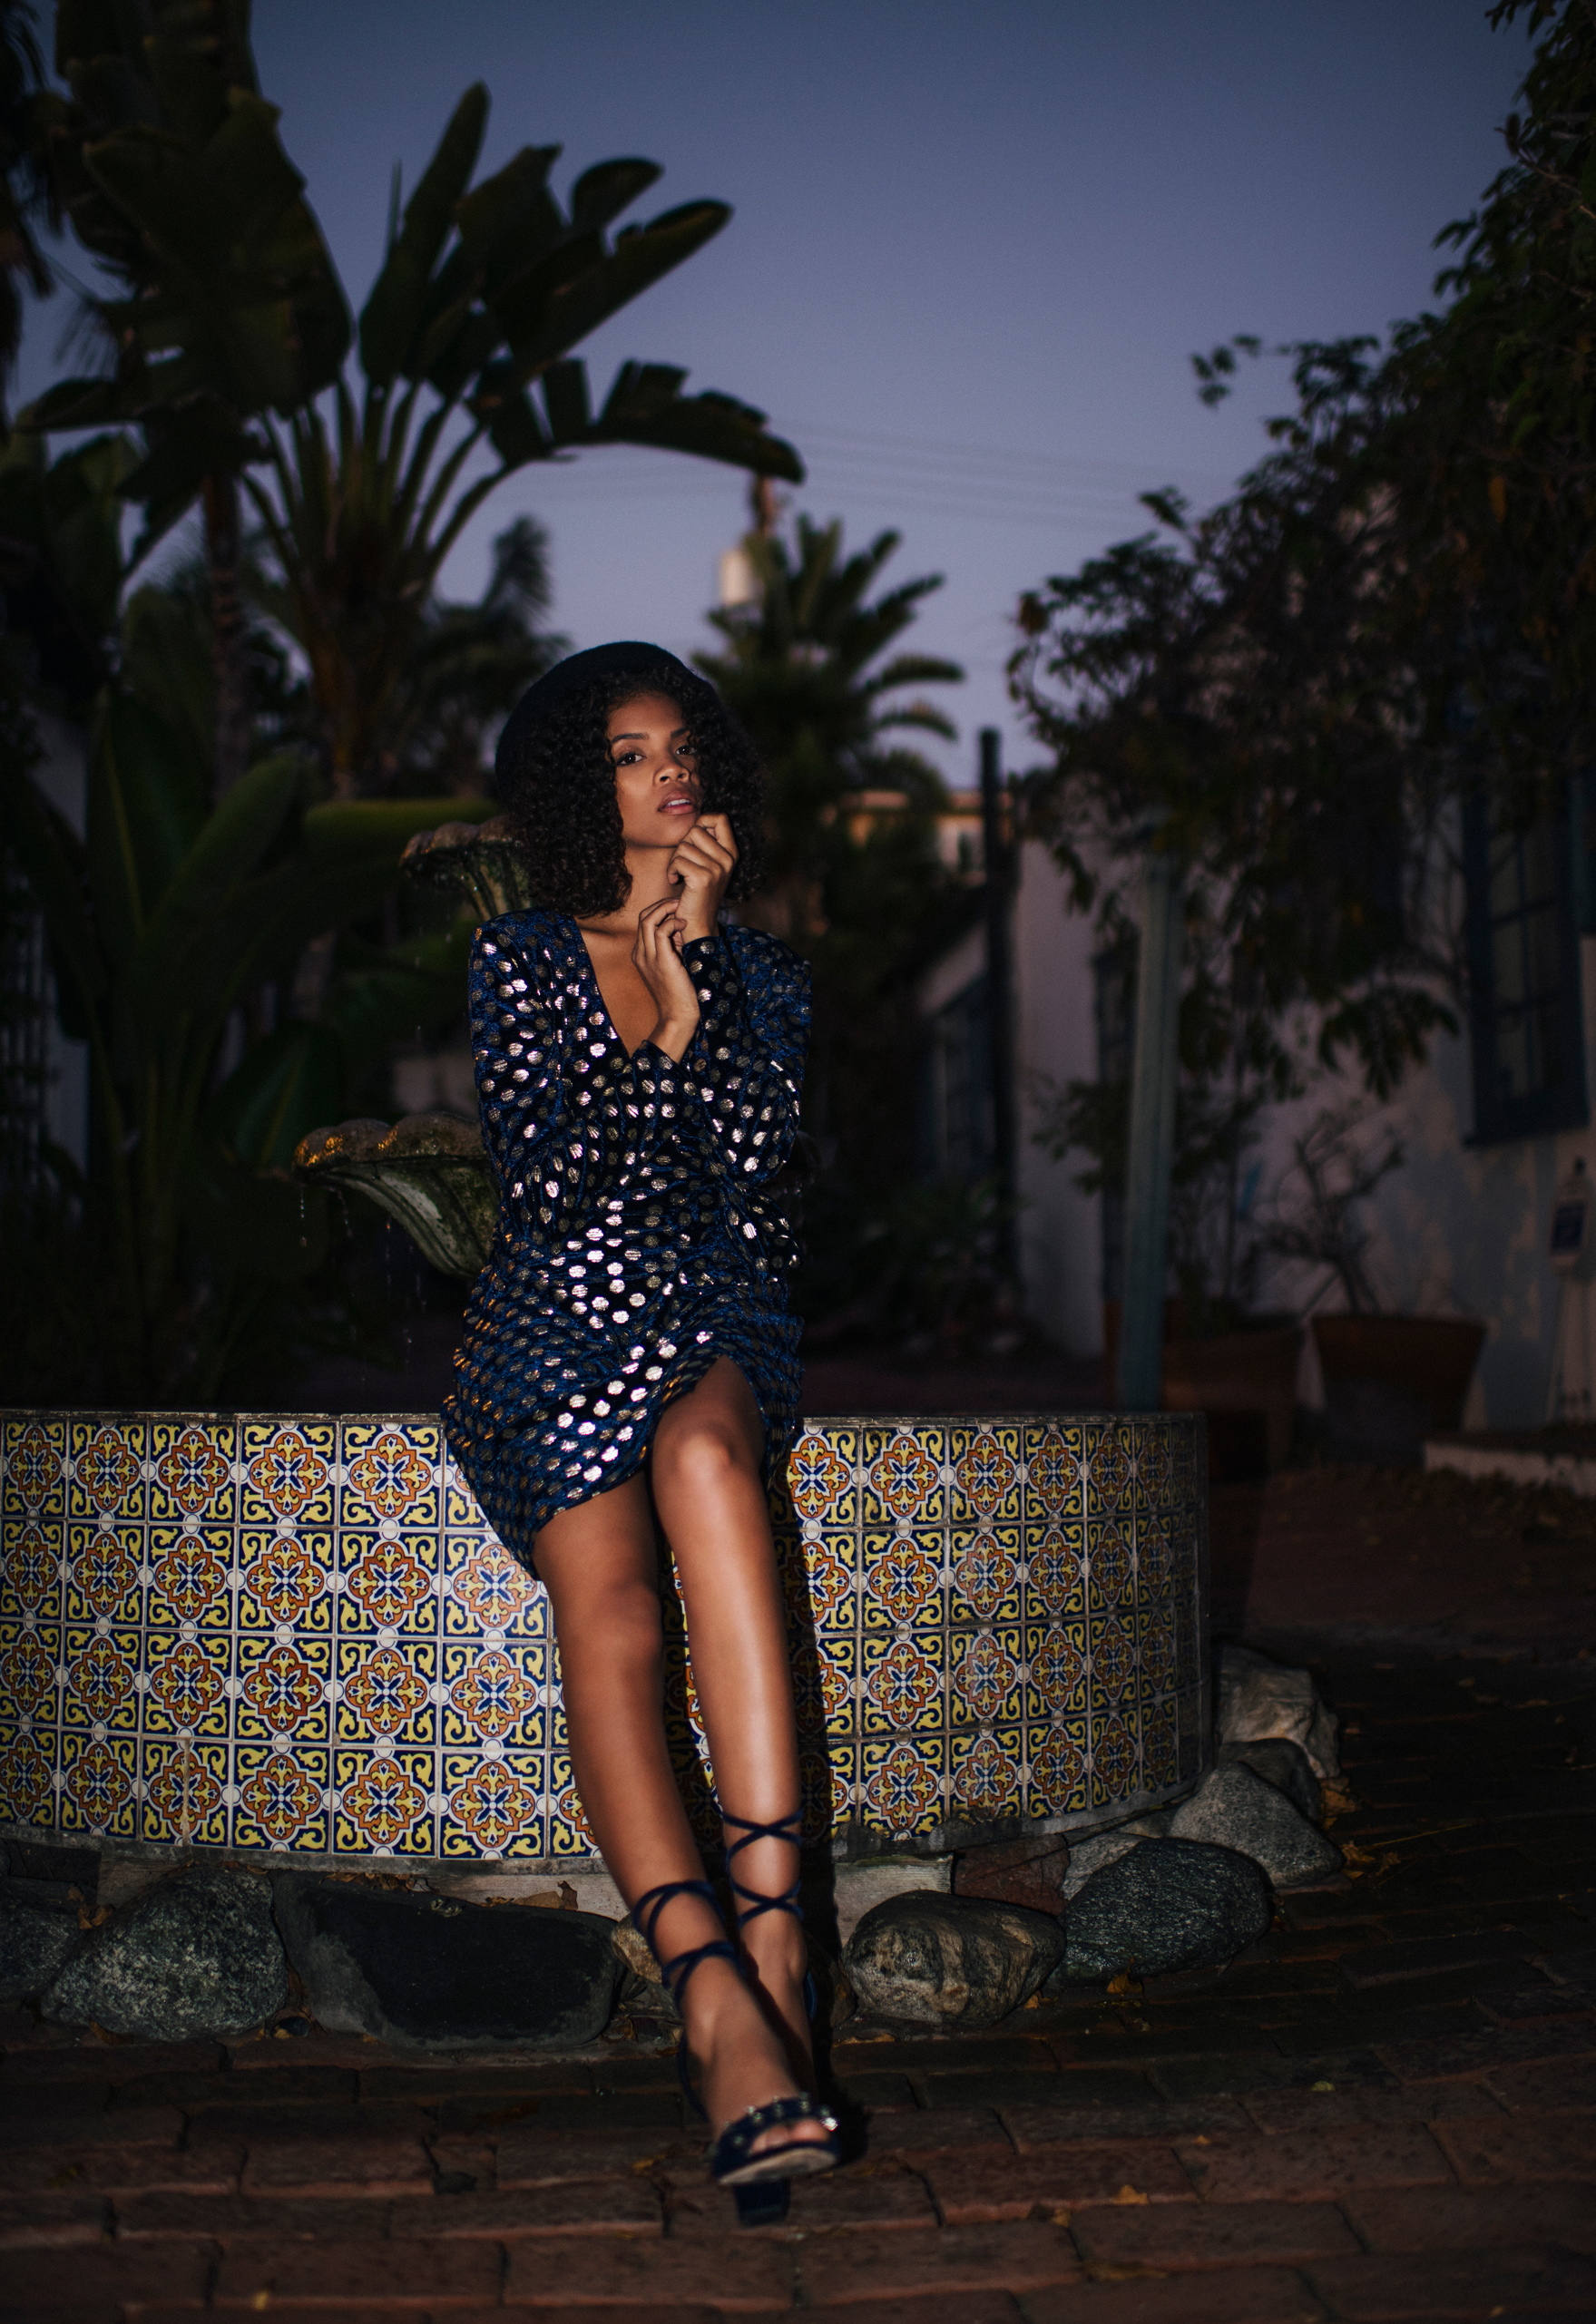
Edited with our Instant Film Pack:

Screen Shot 2020-04-28 at 1.44.51 PM.jpg

WONDERLAND COLORFUL & WARM BLOGGER PRESETS

I created our Wonderland Pack to create beautiful warm vibrant film like colorful images from our travel photography & for my personal family images. I especially love using these to edit fashion/blogger images.

These Presets/ACRs will give you creamy dreamy skin tones and vibrant colorful backgrounds with beautiful film grain like you are a colorful wonderland.

The film grain is removable/adjustable with the included adjustment presets.

Edited with our Wonderland Pack:

Screen Shot 2020-04-28 at 1.44.59 PM.jpg

Modern Film Like Images in Lightroom

If you like muted tones, film hues, and soft greens this pack of Lightroom Presets & Photoshop ACRs is perfect to add to your editing collection.

Our Muted Tones Pack will shift colors to a more film aesthetic, slightly desaturate tones and make others vibrant. For creamy skin and dark greens. I created our Muted Tones Pack specifically for weddings and family portraiture sessions. Best on outdoor images but will work on indoor images too. This pack will work great on underexposed and properly exposed images.

You can view the full product within our shop HERE

Edited with our Muted Tones Pack:

BRIGHT PASTEL LIGHTROOM PRESETS FOR WEDDING & PORTRAITS

I'm so excited we just launched a new product of our shop today! I've been working super hard for the last three months to design some super versatile presets for Lightroom & Photoshop ACR. We will be launching about 18 new packs in the next month.

We have been super busy between travels, photography, and editing the past 6 months. I wanted to create new presets that reflect our current editing style. Our New Bright Pastel Pack will give your images a Pastel color profile and brighten & soften your images.

These can be used in Lightroom & Photoshop. You can view the full description on our SHOP

Edited with our Bright Pastel Pack:

Screen Shot 2020-04-28 at 1.45.28 PM.jpg

Real Estate Photography Photoshop Actions

I am very excited to launch my latest Real Estate Photography Editing Product on our SHOP. I created Real Estate Photoshop Actions and Sky Swap Overlays. I compiled this bundle of Actions and Overlays from my personal editing for my Realtor Clientele.

You will be able to correct, create an HDR look for interior and exterior shots, and swap out a drab sky for a vibrant sunset.

Edited with our Real Estate Actions:

How To Get Bright & Airy Images

If you are trying to achieve a Bright & Airy look in your photographer you will want to start with the location and time of day. You will want to choose a bright location that is lit from behind or has a bright background color. In camera you will want to properly exposure your images or even slightly over expose your images. Make sure you are shooting in RAW.

Once you have imported your image to Lightroom are or working not hem in Photoshop Camera Raw you will want to adjust your white balance and exposure according to your lighting and location.

Once you have adjusted those you can apply your Preset/ACR/Action. We have a variety of Bright & Airy Products to help you achieve this look when editing. You can view my favorite, our Bright & Airy Wedding Pack within our SHOP. This pack isn’t just for weddings you can use this on all forms of portraiture.

Edited with our Bright & Airy Pack:

Kelsey // Laguna Beach // Editorial Bundle

Kelsey and I photographed an hour before sunset which is my usually time to photograph outdoor locations. 

We photographed against a white wall, Stairs and along the beach. We found a neat Lifeguard tower and caught some gorgeous sunset tones. I used our Editorial Pack & Teal And Orange Pack to edit these images. You can view our products used to edit this shoot within our SHOP

Edited with our Teal & Orange & Editorial Packs:


Alanna // Laguna Beach // Editorial Pack

Alanna and I met up in Laguna Beach at one of my favorite locations. We shot an hour before sunset and I used my Nikkor 35mm 1.4 lens. I shot this session slightly underexposed to maintain sharpness and to achieve an almost gritty look when I bump up the exposure and apply my presets.

I edited this session with our Editorial Pack. Before apply the presets I adjusted my white balance and exposure. Then I applied the presets. Our Editorial Pack is my most used Presets/ACRs for editing my Instagram posts. They are reminiscent of analog film and have squashed highlights, mild film grain, and a boost in vibrancy. They are great for portraiture, weddings, engagements, editorial, and street photography. You can view this pack with before and afters within our SHOP

Edited with our Editorial Pack:

Britney // San Clemente // Neon Pack

I am always trying to incorporate color as much as possible in my shoots. I met up with Britney in San Clemente at 7:00 pm. We shot in front of a red & blue neon sing. I used a prism to create different in camera effects to these portraits.

Anytime I shoot at night with neon signs and fairy lights I always want my model wearing glasses. This gives your images  another element and something to reflect the beautiful lighting. I used my 50mm Nikkor 1.4 lens for this shoot.

Once I imported the images into Lightroom, I choose the images I am going to edit, and apply my presets. I created the Neon Pack to help achieve pink and light blue tones in neon lit portraits. I didn’t much like the red and dark blue starting point of this image. I think that light pink is more inviting and flattering.

You can view our Neon Pack writhing our SHOP

Edited with our Neon Pack:

Lauren // Laguna Beach // Editorial Pack

As a photographer/editor/designer my looks for photographing/editing are always changing. I made our Instagram Pack because I recently made new presets which have been my go to for all my recent shoots. I wanted to make these available to all our customers. This pack has 10 Presets & 10 ACRs as well as a tool kit to help make minor adjustments.

These are best used on outdoor photo shoots or indoor flash photography. Our Editorial Pack is reminiscent of film with a mild film grain which can be easily removed/reduced.

I met up with Lauren in Laguna Beach at my favorite little vintage diner. I used my 35mm Nikon 1.4 lens and my Nikon SB-500 Speed Light to achieve the best lighting. I pointed my flash directly up to bounce the flash off the ceiling and achieve a softer look.

I then applied our Editorial Pack ACRs to my favorite images. You can view this pack in our SHOP

Edited with our Editorial Pack:

Warm Film Pack & Wedding Photography

I got my start in professional photography by shooting weddings/engagements/families. I mainly shoot portraiture/editorial/fashion now. I prefer to shoot portraiture because I have more control over the shoot and the editing process. 

From time to time we still take on a wedding/engagement shoot, and I also process and edit for other wedding photographers. My favorite pack to edit weddings/engagements for couples/photographers who are going for a moody film look is our Warm Film Pack. This pack is also available in our Bundle Pack for Moody Weddings. You can view both Packs with our SHOP

Edited with our Warm Film Pack:

Screen Shot 2020-04-28 at 3.10.33 PM.jpg

Editing Process // Lightroom Or Photoshop?

I get a lot of questions about the pros and con of Lightroom vs. Photoshop and what I use more. I use both for my editing process.

To break down my editing process for a portrait shoot: I start importing my raw files into Lightroom. Once in Lightroom I go through the images and flag my favorites from each pose that I will be editing. I then filter to only see my flagged images. This is the fastest process I have found to organize and decide which images to edit.

Lightroom or Photoshop Blog?.jpg

I then export the images as DNGs to maintain their raw information. Once exported I open them in Photoshop Camera Raw. I adjust my exposure and white balance if needed. I them use my Retouching Actions to smooth skin texture, highlight, and balance skin tone. Next I head back into Camera Raw and apply my ACR.

I then save a full resolution file and export for web. This process has worked wonders for me to maintain consistency and speed up my workflow.

You can definitely use one or the other but I have found using both is the best option.


How To Maintain Consistency When Editing

Maintain consistency when editing your work is important. It’s important to have a consistent look to your work within a shoot and for your social media. You create a look people start to recognize from you. Making sure images within a shoot have the same tone and look is important for you clients too.

So how to maintain consistency when you shoot in different locations with different lighting and colors? It can be hard to achieve and can take a little work. At some point you will need to decide what editing style you like. Do you like the Bright & Airy look? Do you like the Moody Film Look? Do you like Vibrant Colorful images? Do you like the Bright Film look? 

Maintain Consistency in Photoshop.jpg

Once you find your style you can maintained that look by editing with the same method. Also a lot of the outcome starts in camera. If you like the Bright & Airy look you will want to properly exposure if not slightly over exposure. You will also want to shoot against bright  backgrounds. If you like the Moody Film look you will want to shoot at sunset or sunrise and slightly underexpose your images. Getting a great base helps maintain consistency. 

To sum it up maintaining consistency starts with deciding what you style you like. Planning out your locations and times accordingly. Then make sure you are setting your self up for success by achieving your style in Camera to get a great base. In editing make sure you edit with the same style.